5 Irresistible Reasons to Try This Ultimate Grilled Garlic Butter Oysters Recipe
Grilled oysters are a true delicacy, but when paired with rich garlic butter, they transform into an irresistible dish that’s perfect for parties, family dinners, or even solo indulgence. Whether you’re a seasoned chef or a seafood enthusiast eager to try something new, this Grilled Garlic Butter Oysters recipe will take your taste buds on a flavor-packed journey. In this comprehensive guide, we’ll walk you through everything you need to know to create this mouthwatering dish, from selecting the freshest oysters to mastering the art of grilling.
Grilled Garlic Butter Oysters

Why Grilled Garlic Butter Oysters are a Must-Try
The combination of smoky grilled oysters with melted garlic butter creates a sensational burst of flavor. Not only is this dish packed with rich, savory notes, but it’s also incredibly easy to prepare. Plus, oysters are loaded with nutrients like zinc, vitamin D, and healthy omega-3 fatty acids, making them a nutritious addition to your diet. Whether you’re hosting a summer barbecue, a romantic dinner, or a casual get-together, Grilled Garlic Butter Oysters are sure to impress.
Ingredients for Grilled Garlic Butter Oysters
To make this mouthwatering recipe, gather these essential ingredients:
Oysters
- 12 fresh oysters, cleaned and scrubbed
- Crushed ice for serving
Garlic Butter Sauce
- ½ cup unsalted butter, softened
- 4 cloves garlic, minced
- 1 tablespoon parsley, finely chopped
- 1 tablespoon lemon juice
- ½ teaspoon chili flakes (optional for spice)
- Salt and pepper to taste
Garnishes
- Lemon wedges
- Fresh parsley, finely chopped
Step-by-Step Instructions to Prepare Grilled Garlic Butter Oysters
Step 1: Prepare the Garlic Butter
- In a mixing bowl, combine softened butter with minced garlic, parsley, lemon juice, salt, and pepper.
- Mix well until the butter is fully infused with flavor.
- If you like a spicy kick, add chili flakes for some extra heat.
Step 2: Shuck the Oysters
- Carefully open the oysters using an oyster knife.
- Slide the blade under the oyster to detach it from the shell.
- Be sure to keep the oyster’s natural brine intact for added flavor.
Step 3: Preheat the Grill
- Preheat your grill to medium-high heat (about 400°F or 200°C).
- For enhanced flavor, consider adding wood chips to your grill for a smoky essence.
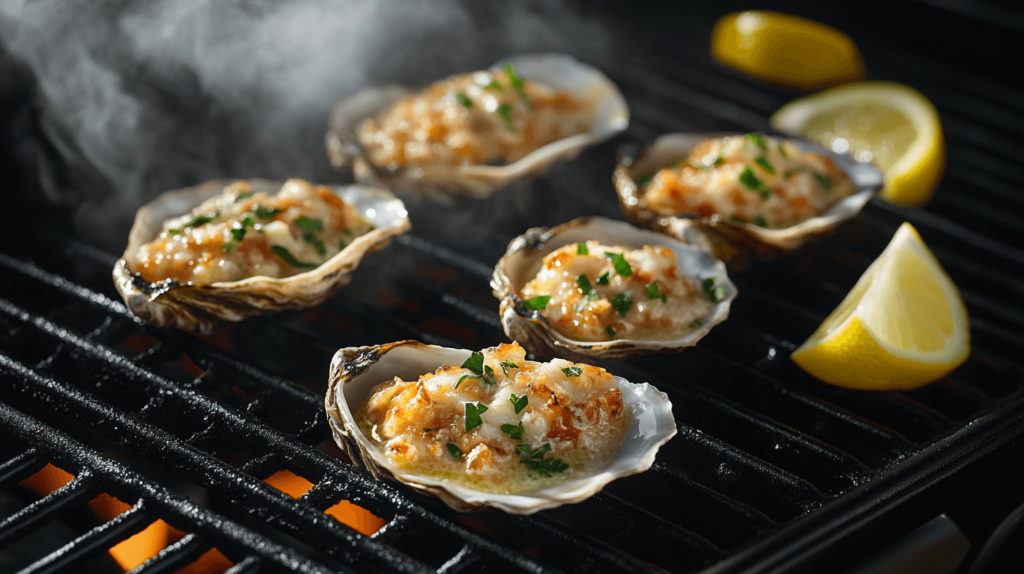
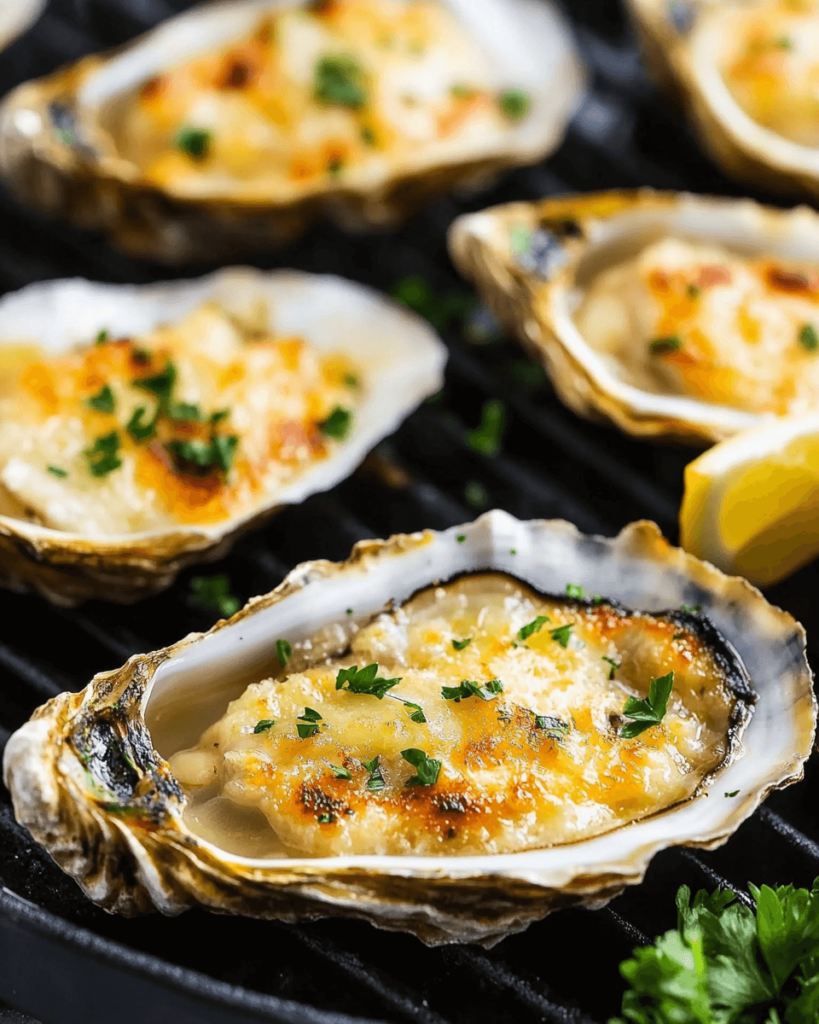
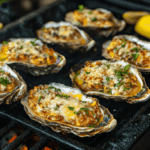
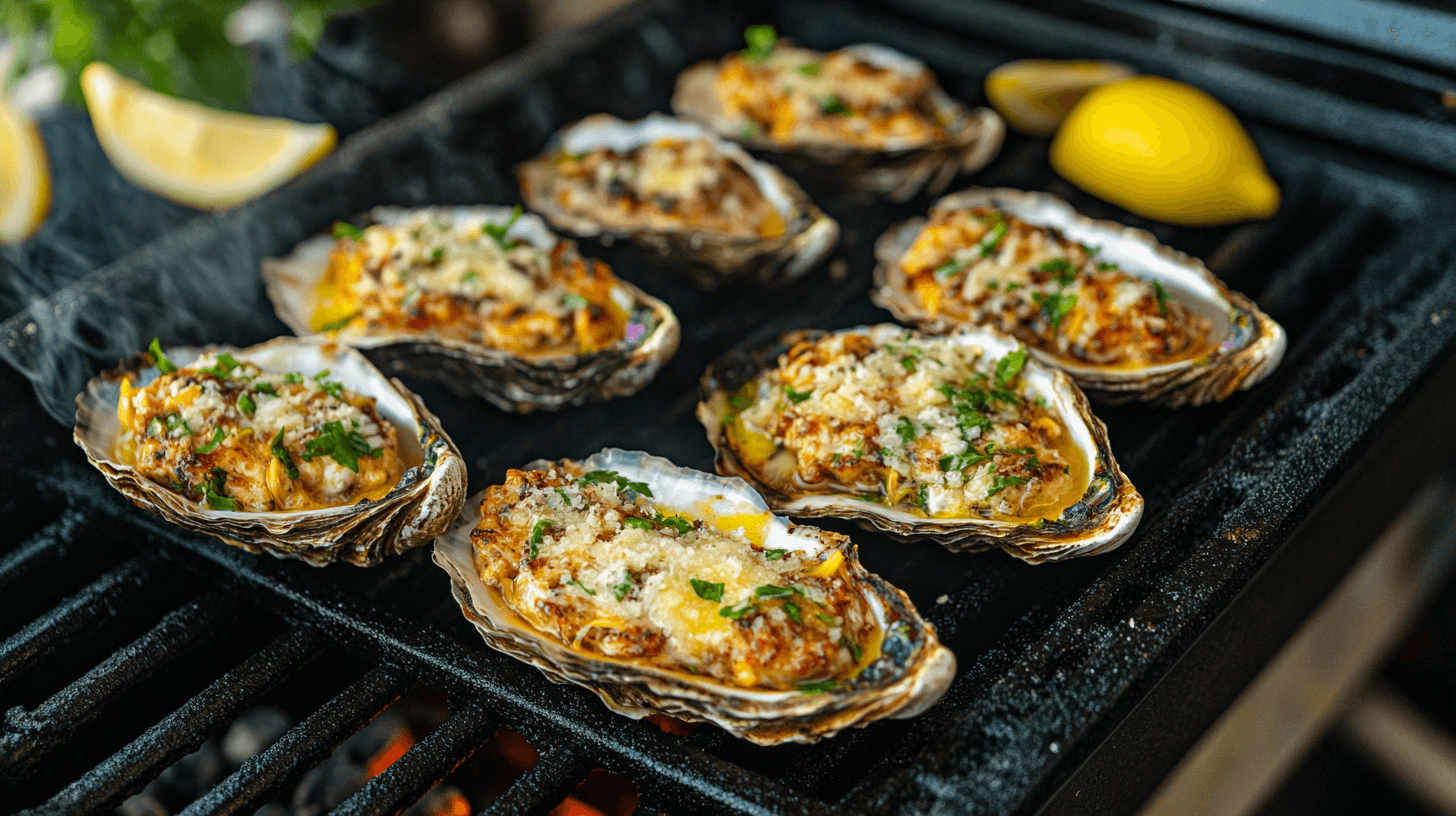
Step 4: Grill the Oysters
- Place the shucked oysters on the grill with the cupped side down to hold the brine.
- Add a spoonful of your prepared garlic butter mixture to each oyster.
- Grill for 5–7 minutes or until the butter is melted and bubbling.
Step 5: Serve and Enjoy
- Carefully remove the oysters from the grill.
- Garnish with chopped parsley and fresh lemon wedges for a refreshing twist.
- Serve over crushed ice for an elegant presentation.
Pro Tips for Perfect Grilled Garlic Butter Oysters
- Choose fresh oysters: Fresh oysters ensure optimal flavor and texture. Look for oysters with tightly closed shells.
- Use a cast-iron pan: If you’re worried about oysters tipping over, placing them in a cast-iron pan on the grill ensures stability.
- Add a dash of cheese: Sprinkle some Parmesan or Pecorino Romano on top before grilling for a creamy, savory layer.
- Don’t overcook: Oysters cook quickly, so keep a close eye on them to avoid a rubbery texture.
- Experiment with flavors: Try adding a splash of white wine or a sprinkle of smoked paprika to the garlic butter for a unique twist.
Pairing Suggestions for Grilled Garlic Butter Oysters
Pair your Grilled Garlic Butter Oysters with these delicious accompaniments:
- Crispy French bread to soak up the buttery goodness.
- Chilled white wine such as Sauvignon Blanc or Chardonnay.
- Fresh green salad for a refreshing contrast.
- Garlic butter pasta for a rich, complementary side dish.
The Nutritional Powerhouse of Grilled Garlic Butter Oysters
Grilled oysters with garlic butter aren’t just a feast for your taste buds—they’re also a nutritional powerhouse. This dish combines the natural health benefits of oysters with the wholesome goodness of garlic and butter, creating a meal that’s as nourishing as it is delicious. Here’s a deeper look at why this recipe is a fantastic addition to your diet:
Rich in Zinc
Oysters are one of the best natural sources of zinc, a mineral that plays a crucial role in maintaining a healthy immune system. Zinc helps your body fight off infections, speeds up wound healing, and supports cell growth and repair. Just a few grilled oysters can provide a significant portion of your daily zinc requirement, making them an excellent choice for boosting your overall health.
High in Protein
Protein is essential for building and repairing tissues, and oysters are a fantastic source of high-quality protein. Each serving of grilled oysters provides a substantial amount of protein, which helps promote muscle growth, supports metabolic functions, and keeps you feeling full and satisfied. This makes them an ideal option for fitness enthusiasts or anyone looking to maintain a balanced diet.
Omega-3 Fatty Acids
Oysters are rich in omega-3 fatty acids, which are known for their heart-healthy benefits. These essential fats help reduce inflammation, lower the risk of heart disease, and support brain health. Regular consumption of omega-3s can also improve cognitive function and mood, making grilled oysters a smart choice for both your body and mind.
Low in Calories
Despite their rich flavor, oysters are surprisingly low in calories. This makes them a perfect option for those who want to enjoy a decadent meal without overindulging. When paired with a light garlic butter sauce, grilled oysters become a satisfying yet guilt-free dish that fits well into a calorie-conscious diet.
Additional Nutrients
Beyond the highlights, oysters are also packed with other essential vitamins and minerals, including:
- Vitamin D: Supports bone health and immune function.
- Iron: Helps prevent anemia and boosts energy levels.
- Vitamin B12: Essential for nerve function and the production of DNA and red blood cells.
- Selenium: Acts as an antioxidant, protecting cells from damage.
The Benefits of Garlic and Butter
The garlic butter sauce not only enhances the flavor but also adds its own health benefits. Garlic is known for its anti-inflammatory and immune-boosting properties, while butter provides healthy fats that aid in nutrient absorption. Together, they create a sauce that’s both flavorful and beneficial.
Common Mistakes to Avoid When Grilling Oysters
- Overcooking: Oysters cook quickly, so monitor them closely to prevent a rubbery texture.
- Skipping the Brine: The oyster’s natural juices add essential flavor—don’t lose them!
- Ignoring Shell Cleanliness: Always scrub and rinse oysters thoroughly to remove dirt or debris.
- Using Low-Quality Butter: Opt for high-quality unsalted butter for the best flavor.
- Grilling at the Wrong Temperature: Too high, and the oysters will dry out; too low, and they won’t cook evenly.
Exploring the World of Smoky Seafood Delights
If you’re a fan of seafood, you know that the magic lies in the simplicity of fresh ingredients paired with bold flavors. Grilled oysters with garlic-infused butter are a prime example of how a few high-quality components can come together to create a dish that’s both elegant and approachable. Let’s dive deeper into the nuances of this recipe and explore how you can elevate your seafood game.
The Art of Preparing Fresh Shellfish
When working with shellfish, freshness is non-negotiable. Oysters, in particular, are a delicacy that demands attention to detail. Here’s how to ensure you’re starting with the best possible ingredients:
- Selecting the Right Oysters: Look for oysters with tightly closed shells, as this indicates they’re alive and fresh. Avoid any with cracked or open shells.
- Cleaning and Scrubbing: Use a stiff brush to scrub the shells under cold running water. This removes any dirt or debris that could affect the flavor.
- Storing Properly: Keep oysters in a cool environment, ideally on a bed of crushed ice, until you’re ready to cook.
By taking these steps, you’ll ensure that your oysters are as fresh and flavorful as possible, setting the stage for a truly memorable dish.
Mastering the Garlic Butter Sauce
The Grilled Garlic Butter Oysters sauce is the star of this recipe, adding richness and depth to the oysters. Here’s how to perfect it:
- Use High-Quality Butter: Opt for unsalted butter to control the saltiness of the dish.
- Balance the Flavors: The combination of garlic, parsley, and lemon juice creates a harmonious blend of savory, herbal, and tangy notes.
- Customize to Taste: Add chili flakes for a spicy kick or a splash of white wine for a more complex flavor profile.
This versatile sauce can also be used for other seafood dishes, such as grilled shrimp or scallops, making it a valuable addition to your culinary repertoire.
Grilling Techniques for Perfect Results
Grilling oysters requires a delicate touch to ensure they’re cooked just right. Here are some tips to help you achieve perfection:
- Preheat the Grill: A medium-high heat (around 400°F or 200°C) is ideal for cooking oysters without drying them out.
- Use a Stable Surface: If you’re concerned about oysters tipping over, place them on a cast-iron pan or a grill-safe tray.
- Monitor Cooking Time: Oysters cook quickly, usually in 5–7 minutes. Look for the edges to curl slightly and the butter to bubble.
By following these techniques, you’ll achieve tender, juicy oysters with a delightful smoky flavor.
Serving Suggestions and Presentation Tips
Presentation is key when serving a dish as elegant as grilled oysters. Here’s how to make your creation visually appealing:
- Use Crushed Ice: Arrange the grilled oysters on a bed of crushed ice to keep them chilled and add a touch of sophistication.
- Garnish Thoughtfully: Sprinkle chopped parsley and add lemon wedges for a pop of color and freshness.
- Pair with Complementary Sides: Serve with crusty bread, a crisp salad, or a glass of chilled white wine to round out the meal.
These small touches can elevate your dish from simple to stunning, impressing your guests and enhancing the overall dining experience.
FAQs about Grilled Garlic Butter Oysters
How do I know if my oysters are fresh?
Fresh oysters should have a briny smell, feel heavy for their size, and have tightly closed shells.
Can I grill oysters without shucking them first?
Yes! Place whole oysters on the grill; once they pop open, you can add your garlic butter mixture.
What’s the best way to store fresh oysters before cooking?
Store oysters in a breathable container, covered with a damp cloth, and keep them refrigerated.
Can I use frozen oysters for this recipe?
Fresh oysters are ideal, but frozen oysters can work in a pinch. Thaw them overnight in the refrigerator.
How do I avoid rubbery oysters?
Cook them just until the edges curl slightly—this keeps them tender and juicy.
What’s the best seasoning for grilled oysters?
Garlic butter is a classic choice, but you can also add Cajun spices, smoked paprika, or hot sauce for extra flavor.
Conclusion
Grilled Garlic Butter Oysters are a true crowd-pleaser, blending smoky flavors with rich, buttery goodness. Whether you’re hosting a summer barbecue or simply craving a savory seafood delight, this recipe is easy to master and incredibly rewarding. With fresh oysters, a luscious garlic butter sauce, and a touch of grilling magic, you’ll create a dish that leaves your guests raving for more. So fire up the grill, gather your ingredients, and get ready to enjoy one of the most decadent seafood dishes you’ll ever taste!
PrintGrilled Garlic Butter Oysters
Delicious and indulgent grilled oysters topped with rich garlic butter, perfect for gatherings or solo indulgence.
- Prep Time: 15 minutes
- Cook Time: 7 minutes
- Total Time: 22 minutes
- Yield: 4 servings 1x
- Category: Appetizer
- Method: Grilling
- Cuisine: Seafood
- Diet: Paleo
Ingredients
- 12 fresh oysters, cleaned and scrubbed
- ½ cup unsalted butter, softened
- 4 cloves garlic, minced
- 1 tablespoon parsley, finely chopped
- 1 tablespoon lemon juice
- ½ teaspoon chili flakes (optional)
- Salt and pepper to taste
- Crushed ice for serving
- Lemon wedges for garnish
- Fresh parsley, finely chopped for garnish
Instructions
- In a mixing bowl, combine softened butter with minced garlic, parsley, lemon juice, salt, and pepper. Mix well until fully infused.
- Carefully shuck the oysters using an oyster knife, keeping the natural brine intact.
- Preheat your grill to medium-high heat (about 400°F or 200°C).
- Place shucked oysters on the grill cupped side down, add a spoonful of garlic butter to each, and grill for 5–7 minutes until butter is melted and bubbling.
- Remove from the grill, garnish with chopped parsley and lemon wedges, and serve over crushed ice.
Notes
Choose fresh oysters for the best flavor and texture. Don’t overcook to avoid rubbery oysters.
Nutrition
- Serving Size: 3 oysters
- Calories: 250
- Sugar: 1g
- Sodium: 400mg
- Fat: 22g
- Saturated Fat: 12g
- Unsaturated Fat: 10g
- Trans Fat: 0g
- Carbohydrates: 3g
- Fiber: 0g
- Protein: 10g
- Cholesterol: 70mg
Grilled Garlic Butter Oysters
Ingredients
Method
- In a mixing bowl, combine softened butter with minced garlic, parsley, lemon juice, salt, and pepper. Mix well until fully infused.
- Carefully shuck the oysters using an oyster knife, keeping the natural brine intact.
- Preheat your grill to medium-high heat (about 400°F or 200°C).
- Place shucked oysters on the grill cupped side down, add a spoonful of garlic butter to each, and grill for 5–7 minutes until butter is melted and bubbling.
- Remove from the grill, garnish with chopped parsley and lemon wedges, and serve over crushed ice.