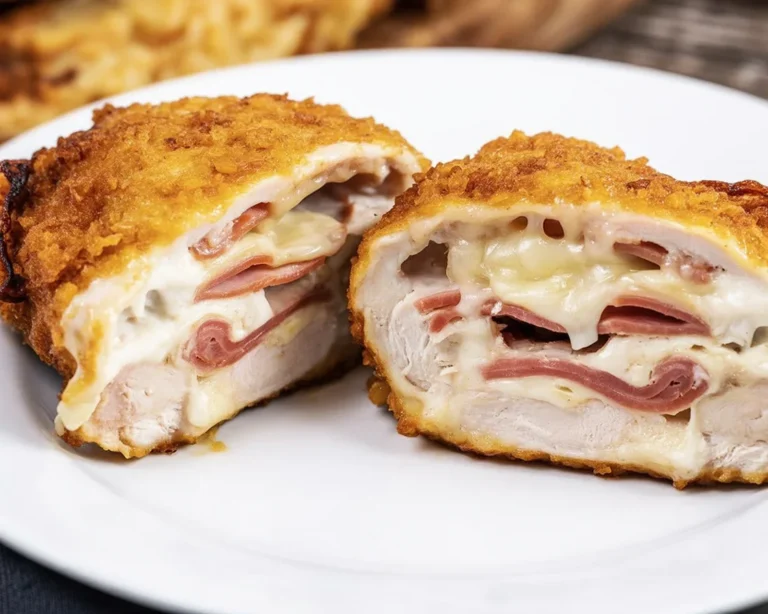
Crispy Air Fryer Chicken Katsu with Homemade Katsu Sauce Recipe
Alright so picture this. You finally got your shiny new air fryer. Maybe you’re (like me) totally over soggy takeout chicken. Or your oven is too slow. Or maybe you just wanna eat something fun but not feel like a slug after.
Air Fryer Chicken Katsu with Homemade Katsu Sauce totally solved that problem for me. It’s golden-crispy, not greasy, tastes like a five-star restaurant (no joke) and—OK this is the best part—there’s almost no mess. Friends, it’s weirdly satisfying to crunch into this chicken without oil… and c’mon, homemade sauce? Chef’s kiss!
Ingredient Tips
Alright. I’m not about making things complicated, so here’s how I keep shopping easy. First off, boneless chicken thighs are my go-to for Air Fryer Chicken Katsu with Homemade Katsu Sauce. Thighs stay juicy, don’t dry out like breasts, and honestly I could write a love letter to them. Panko breadcrumbs? Please don’t swap those out. Regular breadcrumbs just don’t crunch the same. Also, keep an eye on the labels at the store. Japanese panko = extra crunch.
Now for the katsu sauce. It’s like BBQ sauce and ketchup had a delicious baby. You’ll need ketchup, Worcestershire sauce (I always, always spell it wrong), and soy sauce. I use low-sodium cause I like a heavy hand when I pour. Oh, and don’t forget a smidge of sugar and garlic powder. If you wanna get wild, try a dab of Dijon mustard.
That’s my secret weapon when I want the sauce to pop a bit more.
And, big tip—don’t use old eggs for dipping the chicken. Shells break easy and you’ll end up fishing them out… not a fun vibe.
Air Fryer Chicken Katsu with Homemade Katsu Sauce
Recipe Instructions
Okay, let’s roll up those sleeves. Here’s the breakdown for making Air Fryer Chicken Katsu with Homemade Katsu Sauce. First, pat dry your chicken. I skip that sometimes and regret it because the panko slides right off. So be patient.
Next, a lil assembly line: flour first, then egg bath, then your beautiful mountain of panko. Press those breadcrumbs on if you want it super crispy.
Into the air fryer, but wait—spray the chicken lightly with oil first. That’s how you get that magical fried vibe. I set mine at 390°F, about 10 to 12 minutes each side (flip halfway). It smells so good you’ll wanna rip one out early… don’t. Pink chicken = not a party.
While it cooks, mix up your sauce. Clumsy me has mixed it while distracted and added too much Worcestershire; just taste as you go, you’ll nail it.
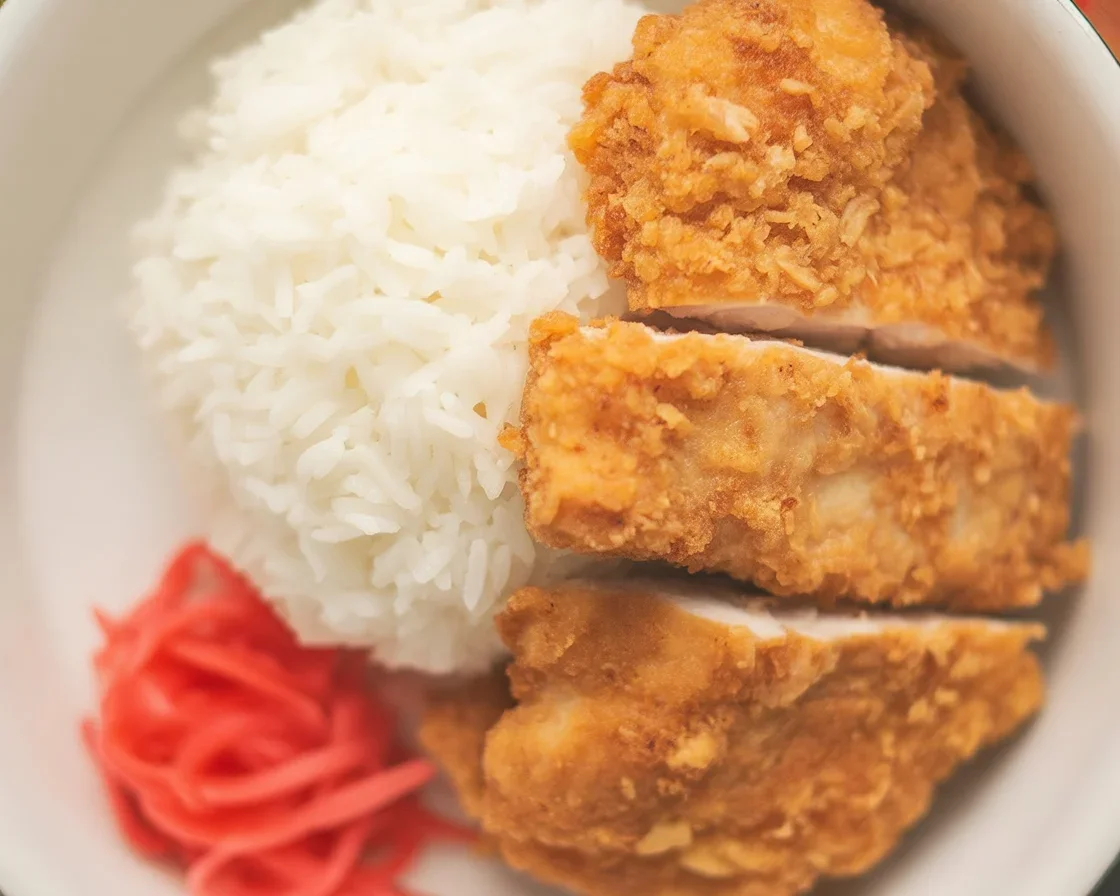
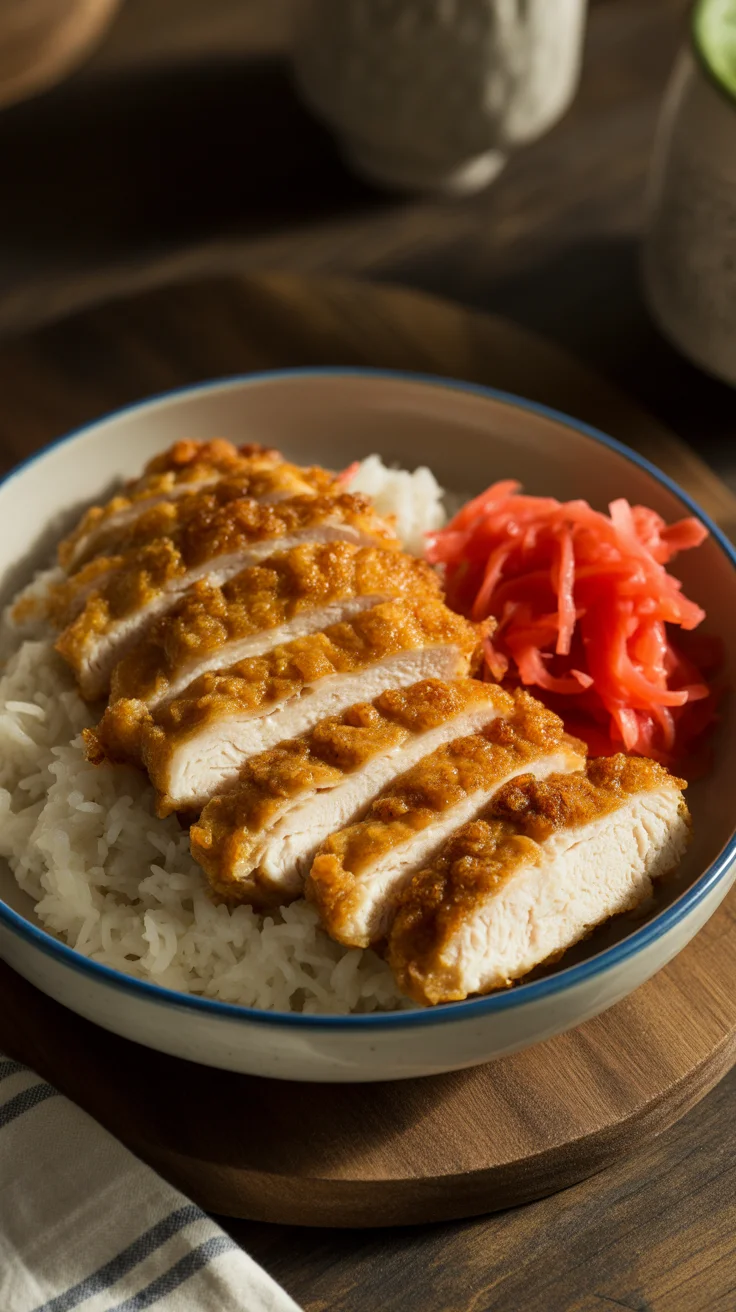
Slice your chicken after it rests a couple minutes—just like they do in Japanese restaurants.
I know this sounds casual but following these steps is how you get that golden crust and juicy middle.
Air Fryer Chicken Katsu with Homemade Katsu Sauce
Mexican-Style Air Fryer Stuffed Chicken Breasts
Tips for Making Air Fryer Chicken Katsu
Here’s where I get real with you. You can skip some steps in recipes, but with Air Fryer Chicken Katsu with Homemade Katsu Sauce, a few things are non-negotiable. First, season the flour and panko—nothing sadder than a bland crunch!
If you’re making a big batch, don’t crowd the air fryer. Spacing it out is what keeps things crisp. If the pieces are touching, you basically get a chicken cuddle puddle (less cute, more soggy).
I also tested different brands of panko—some were way better than others. Read the box and get the Japanese stuff if you can.
Oh, and don’t forget: when you flip the chicken halfway, a second spritz of oil brings the golden level up tenfold.
“Tried this recipe for my picky teen, and she went back for seconds! The air fryer method made clean-up so much faster too. Officially our weeknight favorite.” —Emily from Chicago
Air Fryer Chicken Katsu with Homemade Katsu Sauce
What to Serve with Easy Air Fryer Chicken Katsu
Now for the fun part—sides! This is totally up to you, but here’s what I swear by:
- Shredded cabbage salad (with a squeeze of lemon or a mild sesame dressing, oof)
- Steamed rice (white, brown, even jasmine—nothing fancy required)
- A spoonful of extra katsu sauce for dippin’ (that’s half the point)
- Miso soup on the side, if you really wanna feel like you’re eating out
If you have leftovers, throw ‘em on sandwiches or even in a salad the next day. Chicken Katsu is versatile. That crunch? Heck yeah.
Air Fryer Chicken Katsu with Homemade Katsu Sauce
Nutrition Facts (per serving)
Listen, I’m no nutritionist, but I checked this out because someone always asks. With Air Fryer Chicken Katsu with Homemade Katsu Sauce, you get that satisfying bite with so much less oil. The calories are lower than traditional fried versions (big win!). Protein’s good—thighs deliver. Carbs come mainly from the panko and the rice if you serve it.
What’s wild is the fat is way down, especially if you stick with a light spray of oil. Sodium you’ll wanna watch mostly because of the sauces. Sugar? It’s mostly in the ketchup for your katsu sauce.
So this recipe is lighter, but still fills that fried chicken craving gap. Win-win if you ask me.

Air Fryer Chicken Katsu with Homemade Katsu Sauce
Crispy and juicy air fryer chicken katsu served with a delicious homemade katsu sauce, perfect for a quick weeknight dinner.
- Prep Time: 15 minutes
- Cook Time: 25 minutes
- Total Time: 40 minutes
- Yield: 4 servings 1x
- Category: Main Course
- Method: Frying
- Cuisine: Japanese
- Diet: Gluten-free (if using gluten-free panko)
Ingredients
- 4 boneless chicken thighs
- 1 cup panko breadcrumbs
- 1/2 cup all-purpose flour
- 2 large eggs
- 1/4 cup ketchup
- 2 tablespoons Worcestershire sauce
- 2 tablespoons soy sauce (low-sodium)
- 1 teaspoon sugar
- 1 teaspoon garlic powder
- Optional: 1 teaspoon Dijon mustard
- Oil spray
Instructions
- Pat dry the chicken thighs.
- Set up an assembly line: dip chicken in flour, then egg, and finally coat with panko breadcrumbs, pressing firmly.
- Lightly spray the chicken with oil.
- Place chicken in air fryer and cook at 390°F for 10-12 minutes, flipping halfway through.
- While chicken cooks, mix together katsu sauce ingredients and adjust to taste.
- Once cooked, let chicken rest for a couple of minutes, then slice and serve.
Notes
For a crispy texture, do not crowd the air fryer. Season the flour and panko breadcrumbs for added flavor.
Nutrition
- Serving Size: 1 serving
- Calories: 350
- Sugar: 5g
- Sodium: 800mg
- Fat: 12g
- Saturated Fat: 3g
- Unsaturated Fat: 6g
- Trans Fat: 0g
- Carbohydrates: 40g
- Fiber: 2g
- Protein: 20g
- Cholesterol: 150mg

Air Fryer Chicken Katsu with Homemade Katsu Sauce
Ingredients
Method
- Pat dry the chicken thighs.
- Set up an assembly line: dip chicken in flour, then egg, and finally coat with panko breadcrumbs, pressing firmly.
- Lightly spray the chicken with oil.
- Place chicken in air fryer and cook at 390°F for 10-12 minutes, flipping halfway through.
- While chicken cooks, mix together katsu sauce ingredients and adjust to taste.
- Once cooked, let chicken rest for a couple of minutes, then slice and serve.