Fluffy healthy Greek yogurt bagels made with low-calorie ingredients, perfect for breakfast.

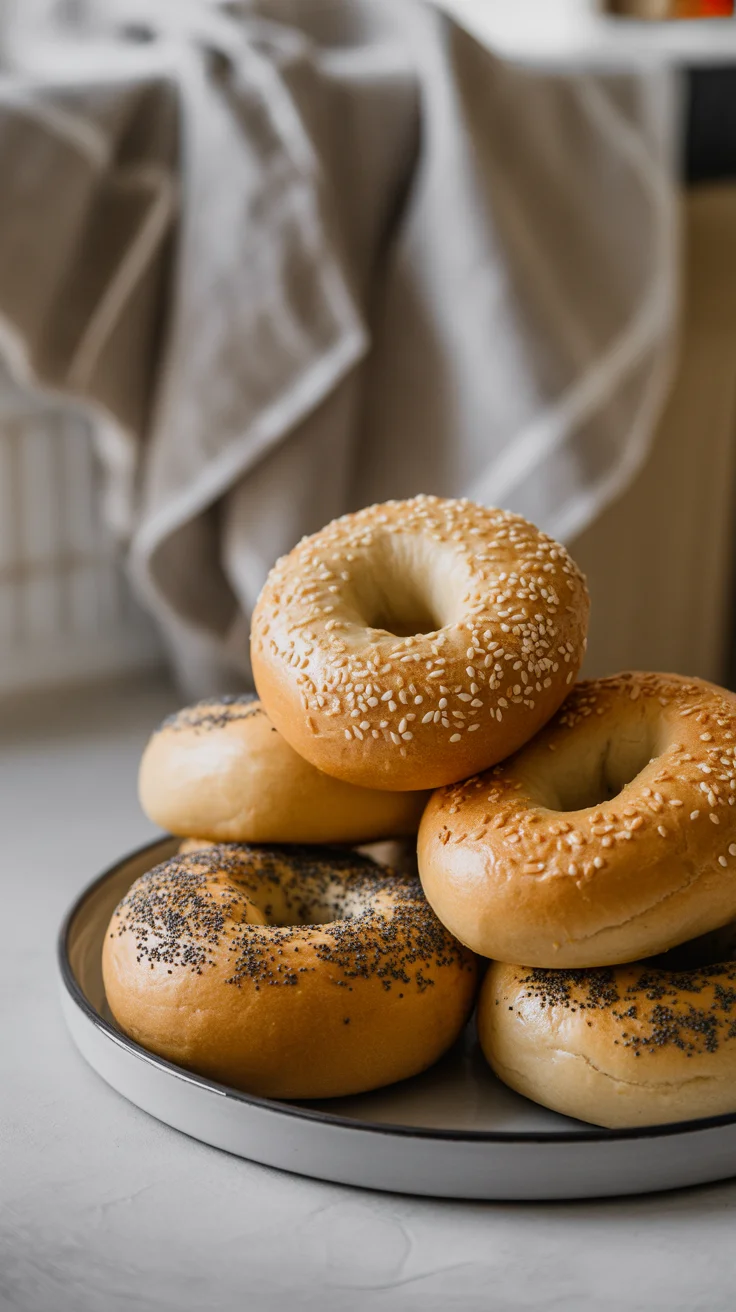
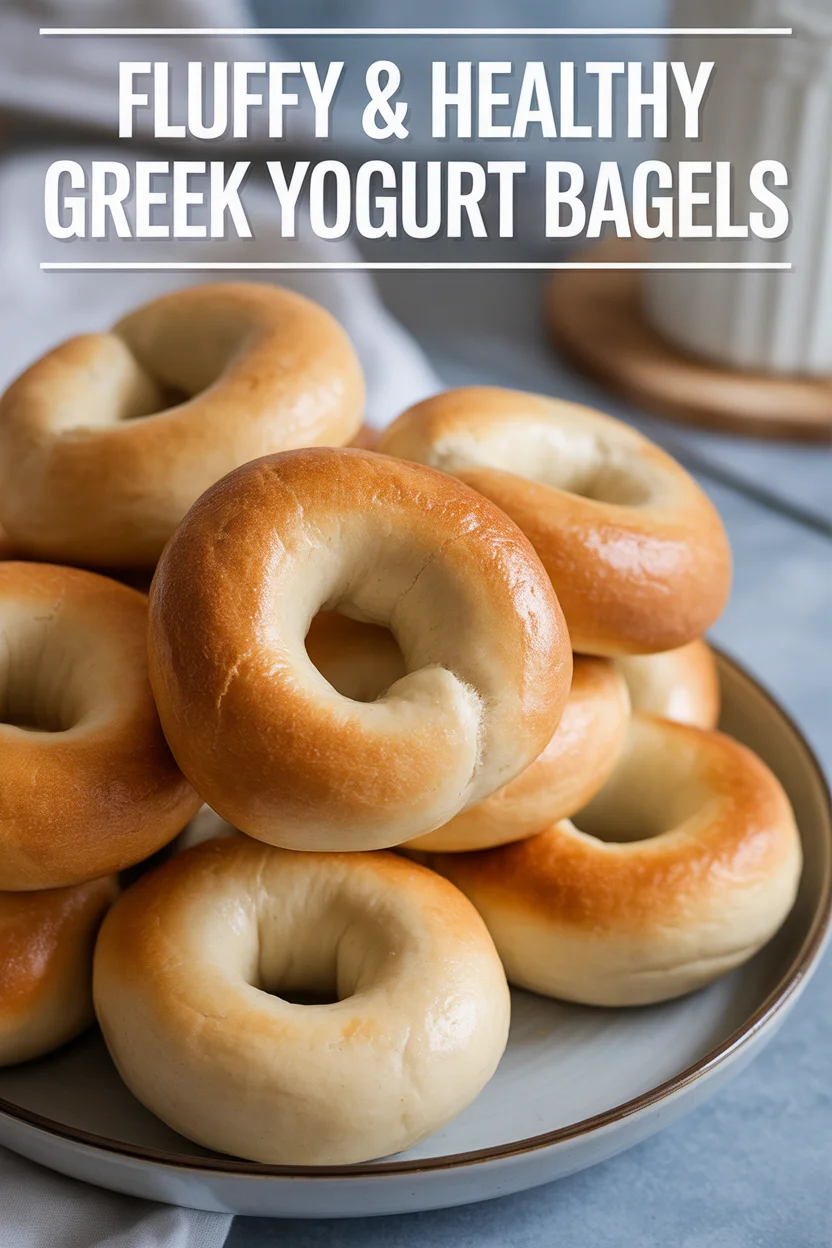
Fluffy & Healthy Greek Yogurt Bagels

Fluffy Healthy Greek Yogurt Bagels are honestly my answer to so many of life’s snack-time headaches. Seriously, ever woken up craving a chewy, golden bagel but then felt guilty about the carb bomb? (Been there. Too many times, to be real). These little beauties save the day—no fuss, no yeast, and you get to sneak in extra protein from Greek yogurt.

Fluffy Healthy Greek Yogurt Bagels

Fluffy Healthy Greek Yogurt Bagels

Kinda magic, right? If you’re already drooling over tasty, smart eats, you might wanna peek at these 5-minute healthy Greek yogurt chia pudding snacks too. They’re quick, filling, and won’t have you running around like a chicken with its head off.

What Makes Greek Yogurt Bagels Healthier?

So. Why use Greek yogurt in your bagels? Here’s where things go from just “pretty good” to “wait, these are good for me?” First up, Greek yogurt packs in protein. That’s good if you’re hungry (always, me). Protein keeps you full, longer. And energy? Yep, more of that too.

Second, we ditch the oil and butter. Instead, Greek yogurt makes dough soft, almost pillowy. Your teeth gently bounce off it—never crumbly or weirdly dry. Plus, these bagels are baked, not boiled.

That means lighter texture and, for real, less hassle. Swapping some white flour for whole wheat? Now we’re talking extra fiber in every chewy bite. I swear I’ve even made these for the pickiest eaters in my family, and they nearly inhaled them.

One last thing—no fancy equipment required. Not everyone has time or patience for all that rising and kneading. You just mix, roll, and bake. That’s it!

Fluffy Healthy Greek Yogurt Bagels

“I never knew I could make real bagels that don’t take hours. These changed the breakfast game for me.” — Jenny P.

Fluffy Healthy Greek Yogurt Bagels

Tips To Make The Perfect Bagel

Getting the perfect batch of Greek yogurt bagels isn’t rocket science—but hey, a few tricks up your sleeve never hurt, right? Don’t worry, I’ve absolutely made every mistake here myself (yeah, dough stuck to my hair once).

First off, make sure your Greek yogurt’s thick. The runny kind just messes things up. My first try? Ended up with a sticky blob. Not fun.

Try not to knead the dough too long or too hard. It’s not pizza dough—a little mixing, and you’re set. If the dough’s too wet, sprinkle a touch more flour until it pretty much stops sticking to your fingers. It doesn’t need to be a total dry-ball though.

I use parchment paper on my baking tray—way less clean-up and they don’t stick. Shaping bagels isn’t about perfection either. Uneven rings? Eh, life goes on. (If your house smells like a bakery—take that as a win).

And right before baking, brush on a smidge of egg wash if you want them shiny. Sometimes I skip it. No one at my table complains!

Fluffy Healthy Greek Yogurt Bagels

How To Make Bagels With Greek Yogurt

Ready to dive in? Don’t worry, I’ll keep it as chill as possible since (confession) I’m not great at strict recipes either!

You only need:

  • 1 cup self-rising flour (or all-purpose flour mixed with a little baking powder and salt)
  • 1 cup thick Greek yogurt (plain, not sweetened)
  • 1 pinch of salt (I always do a smidge more, just feels right)
  • 1 beaten egg (optional, for that glossy top)
  • Toppings if you like (hello, sesame seeds or even everything bagel seasoning)

How to do it:

  1. Heat your oven to 375°F. Grab a baking sheet and slap on a piece of parchment or just really grease it up.
  2. In a bowl, mix the flour, salt, and Greek yogurt with a spoon—then your hands—until a dough forms. Don’t freak if it’s sticky at first, just dust a little more flour on your hands.
  3. Plop the dough out on a floured surface. Divide it into 4 chunks. Roll each one into a log and connect the ends. Life hack: If you don’t want round rings, make little dough lumps. They’ll taste the same, I promise.
  4. Brush the tops with your egg (or skip, no big deal), sprinkle toppings, and toss onto your tray.
  5. Bake for about 20-25 minutes. I sometimes broil the tops right at the end for a minute to get ’em extra golden. Watch close so you don’t end up with bagel frisbees.

That’s it. Try not to eat all four before anyone else sees them.

Fluffy Healthy Greek Yogurt Bagels

How To Store and Freeze Bagels

Now this part always trips me up. Are bagels best fresh? Yes, like all baked stuff, but you’ve got options. If you somehow end up with leftovers (never at my place but hey, it could happen), here’s what to do.

Keep them in an airtight container at room temp for two days tops. Any longer and they start morphing into bread doorstops. Want them to last longer? Pop them in a freezer bag and freeze. They freeze like champs. Just let them thaw on the counter or, if you’re as impatient as I am, zap them in the microwave for about 20-30 seconds. Still chewy, still awesome.

And if you like that just baked vibe again, slice one in half frozen and toss it right in a toaster. Maybe burns your fingers but the crispy edges? Oh mama.

(Just please—don’t stick them in the fridge, okay? That’s a bagel crime.)

Fluffy Healthy Greek Yogurt Bagels

Bagel Toppings

The best part. Toppings are where you really get to strut your stuff—pile it on or keep it classic, your call. I’ll rattle off a few crowd-pleasers:

  • Cream cheese (herbed or whipped, goes with everything)
  • Sliced avocado with flaky salt and chili flakes, if you wanna be trendy
  • Nut butter (I go for almond or peanut butter. Brings out the grown-up PB&J vibes)
  • Smoked salmon and red onion for when you’re feelin’ fancy
  • Honey drizzle for a sweet kick

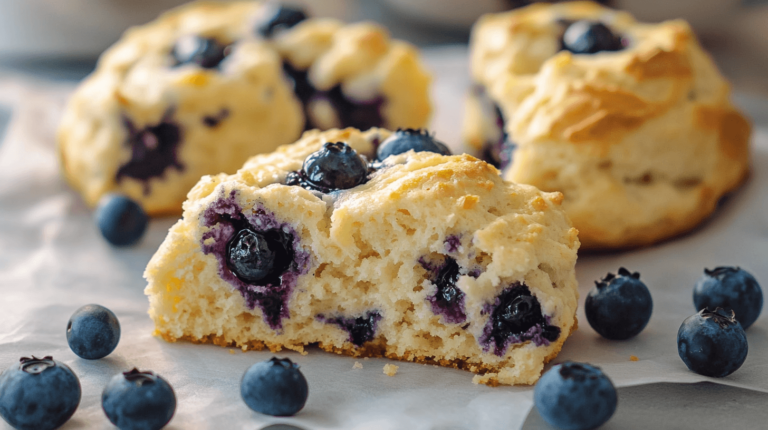
Mix and match, surprise yourself. Oh, and if you want breakfast inspo with Greek yogurt as a main star, check out these greek yogurt blueberry scones—they’ll hit the spot for anyone with a sweet tooth.

Fluffy Healthy Greek Yogurt Bagels

Wrapping it up (with a messy kitchen and a happy belly)

So, if you ever crave a warm, chewy bagel without all the work and regret, Fluffy Healthy Greek Yogurt Bagels are the way. No yeast, barely any waiting, a healthy twist, and zero judgment for eating two at once (c’mon, who’s counting).

Plus, you get to say you baked your own bagels—bragging rights, anyone? Hit up experts like the Healthy Greek Yogurt Bagels – Skinny Fitalicious® for more creative ways to spin your bagel game, or try new Greek yogurt goodies like these Healthy Peanut Butter Greek Yogurt Banana Bread Muffins when you’re ready to switch lanes.

Fluffy Healthy Greek Yogurt Bagels

Trust me—these quickly jumped to five-star restaurant status in my tiny kitchen. Give ’em a try, share a pic, make a mess. Just don’t tell the bakery you’re plotting a bagel takeover. They’ll get suspicious.

Tea, coffee, and Greek yogurt bagels forever.

Fluffy Healthy Greek Yogurt Bagels

Healthy Greek Yogurt Bagels

These fluffy bagels, made with Greek yogurt, are a healthier alternative to traditional bagels—quick to make and packed with protein.
Prep Time 10 minutes
Cook Time 25 minutes
Total Time 35 minutes
Servings: 4 bagels
Course: Breakfast, Snack
Cuisine: American
Calories: 150

Ingredients
  

Main Ingredients
  • 1 cup self-rising flour Alternatively, use all-purpose flour mixed with baking powder and salt.
  • 1 cup thick Greek yogurt Must be plain, not sweetened.
  • 1 pinch salt Add more to taste.
  • 1 beaten egg beaten egg Optional for glazing.
  • to taste toppings like sesame seeds Use your choice of toppings.

Method
 

Preparation
  1. Preheat the oven to 375°F (190°C) and prepare a baking sheet with parchment paper or grease it.
  2. In a bowl, combine the flour, salt, and Greek yogurt; mix with a spoon and then your hands until a dough forms.
  3. Transfer the dough to a floured surface, divide it into 4 pieces, and roll each piece into a log, connecting the ends to form a bagel shape.
  4. Brush the tops with the beaten egg and sprinkle the desired toppings.
Baking
  1. Place the bagels on the prepared baking sheet and bake for about 20-25 minutes, until golden brown.
  2. For extra color, broil the tops for an additional minute, watching carefully.

Notes

Store in an airtight container at room temperature for up to two days. For longer storage, freeze in a freezer bag and thaw as needed.

Similar Posts

  • healthy Moist Yogurt Carrot Cake Muffins for a Healthier Treat

    So, ever get that late-night urge for something sweet, but don’t really want to destroy all the healthy eating work you put in earlier? Yup, “been there, done that” about a million times. That’s why these healthy Moist Yogurt Carrot Cake Muffins for a Healthier Treat are my not-so-secret weapon. They totally hit the spot when you’re just not up for a heavy dessert, but still want something more than a sad rice cake. No weird ingredients, either! And you can whip these up pretty fast—no expert baking powers required. So, hang with me while I spill my favorite no-guilt muffin recipe. Why These Muffins? Okay, let’s be real. Regular carrot cake? Loaded with oil, sugar, and honestly, you just feel sort of… meh after one. My healthy Moist Yogurt Carrot Cake Muffins for a Healthier Treat solve that. They’re genuinely moist (not the dry hockey pucks you buy sometimes), lightly sweet, and you don’t need a truckload of oil or butter because Greek yogurt swoops in for the win. I like ‘em as a grab-and-go breakfast, but they work for dessert too. Also—carrots! I know, I know—“Veggies in my muffin?” Trust me, you don’t even notice except for this magical moist texture, plus a hint of carrot sweetness that totally works. Coconut sugar and a bit of honey keep everything just sweet enough. I make these all the time, and folks always ask for the recipe… or just make puppy eyes for seconds. “I can’t get over how these muffins actually taste like something you’d get at a five-star restaurant (yeah, I said it!) but with zero guilt. Perfect for my kiddos too.” – Jess R. Simple Steps to Make These Muffins Don’t sweat about needing fancy gear. You’ll need: one bowl, a whisk or fork (biceps optional), and a muffin tin. Here’s my general rundown: First, mix all your wet ingredients—Greek yogurt, eggs, a splash of vanilla, maybe a glug of honey. Whisk ’em good. Then, dump in your dry stuff (think flour, baking powder, cinnamon, a sprinkle of nutmeg if you’re feeling spicy, coconut sugar). Stir just to combine. Fold in grated carrots last. Don’t overmix, or you’ll end up with dense muffins. Pour into muffin cups and bake around 20 minutes, give or take (everyone’s oven is moody). Let ‘em cool, if you have that kind of willpower. I know, sounds basic. But seriously—it just works. Serving Suggestions Common Questions Q: Can I swap out the yogurt?  A: For sure. Any unsweetened plain yogurt works, even dairy-free. Texture might vary a tad, but still good. Q: How do I store these?  A: Keep them in an airtight container at room temp for two days, or fridge for up to five. I freeze ‘em too, grab out and zap in the microwave for those hangry moments. Q: Do I really need to peel the carrots?  A: Up to you! I’m lazy and skip it sometimes. Just wash well and grate. Q: Can I use a different sweetener?  A: Yes! Maple syrup, brown sugar, or even date paste will work. Tweak the amount and see what you like. Q: Kids picky? Will they notice the carrot?  A: Nope. Mine call them “orange muffins” and have zero clue. Muffin Perfection, Every Time Honestly, there’s nothing like pulling a tray of these healthy Moist Yogurt Carrot Cake Muffins for a Healthier Treat out of the oven and smelling all that cinnamon-carrot goodness. Plus, you can make little changes—add walnuts, raisins, or skip them if you want. If you want more on why yogurt is so awesome, this Mayo Clinic article got me hooked. Point is, don’t be afraid to get creative. Anyway, you gotta try making these. Promise, they’ll be in your regular baking rotation after one bite!   A healthy twist on classic carrot cake! These moist yogurt carrot cake muffins are light, naturally sweetened, and perfect for breakfast, snack time, or guilt-free dessert.

  • Healthy Lemon Blueberry Yogurt Scones: A Delicious and Nutritious Treat

    Introduction Who says you can’t enjoy a buttery, flavorful scone while keeping it healthy?Healthy lemon blueberry yogurt scones are a game-changer for anyone who craves sweet treats but wants to stay on track with their nutrition goals. Using yogurt instead of heavy cream and loading the dough with antioxidant-rich blueberries and vitamin-packed lemon zest, these…

  • healthy Orange Scones

    Why You’ll Fall for These Orange Scones The Simple Ingredients You Actually Need Step-By-Step: Bringing Orange Scones to Life Serving Suggestions To Level Up Common Questions Go On, Make Your Mornings Way Less Boring Orange Scones are kinda magical when you want something quick for breakfast, but also wanna trick your brain into thinking you’re at a five-star restaurant. Ever drag yourself outta bed and just want a treat to make the day less… meh? Yep, been there. I actually started making these because regular scones got way too boring and, okay, my neighbor wouldn’t stop bragging about her “famous” lemon version. Orange scones hit different. Seriously, that citrusy thing going on is just—wow. If you’re tired of sad donuts or cold cereal, let’s get you sorted out right here.   this … Why You’ll Fall for These Orange Scones Listen, nobody wants a dry, crumbly brick on the plate. The whole idea is to get a scone that’s bright and soft on the inside, with just a hint of gold crunch outside. These orange scones are super easy, too. I’m not just saying that—real talk, my thirteen-year-old cousin bakes them without setting off the smoke alarm. You don’t need a mixer. You don’t even need fancy tools. Mixing with your hands is cool (honestly, it’s kinda therapeutic). The burst of orange makes the kitchen smell like living inside a fruit basket. Sometimes I toss in a handful of chocolate chips, but don’t tell the purists. Go wild with the zest. I always say, “More zest, more best!” There’s science somewhere about citrus making you happy—I say just trust the process.   The Simple Ingredients You Actually Need Here’s the best part: most of this stuff’s already hanging out in your kitchen right now. Really. You’ll need: All-purpose flour—yep, nothing fancy Cold butter (don’t you dare soften it) White sugar and a little pinch of salt (don’t skip this) A juicy orange (zest and juice both, please) Milk or cream (either’s fine—don’t overthink) Baking powder for the puff Maybe an egg, if you’re feelin’ extra Mix this all up and try not to eat the dough raw. Old habits die hard.   Step-By-Step: Bringing Orange Scones to Life First thing, crank up your oven. You want it hot—about 400°F. While it’s preheating, grab a big bowl. Dump in your flour, sugar, baking powder, and salt. Now toss those cold, cubed butter pieces in. Cut them in with your fingers or a pastry cutter, and don’t stress if a few chunks are bigger. Grate in all that lovely orange zest (seriously, let’s not be stingy). Pour in juice and milk (I splash both instead of measuring). If you’re using an egg, whisk and add now. Stir until just combined. Don’t you dare overmix. Plop dough on a floured counter, pat into a messy round disk (about an inch thick), and slice it like a pizza. The rougher the cut, the more rustic and bakery-looking. Set on a sheet lined with parchment. Brush tops with more milk (makes ’em golden). Bake 13-15 minutes till just lightly brown. Let cool for a hot second before eating so you don’t burn your tongue (again… it happens, trust me).   Serving Suggestions To Level Up Top with orange glaze or drizzle with melted chocolate if feeling snazzy. Serve warm with real butter—never margarine, come on now. Toss leftovers in the toaster next morning for a crispy redo. Pair with strong coffee or black tea to cut the sweetness. Common Questions Can I make orange scones ahead of time? Absolutely! I usually bake extra and freeze a few. Just let ’em cool first, then wrap tight. Reheat in oven for a just-baked feel. What if I only have mandarins or clementines? No problem. Go for it. The flavor will be a titch sweeter, but honestly, you might like that better. How do I stop them from being too dry? Don’t overmix the dough and make sure your butter is cold. A little drizzle of extra cream on top before baking never hurts. Do I need a glaze? Nope! I’m team “depends on my mood.” Sometimes a broken scone and a pat of butter is all you need. But a simple orange-powdered sugar glaze makes them café-level. Can I use store-bought orange juice? Eh. Sure, if you’re in a pinch. But fresh is way, way better. You’ll notice the zing. I’ve tried probably fifteen recipes, but this one? Perfection. My husband asked if I bought them from that expensive bakery down the street. Nope, just my own two hands! – Dani M., Vermont…