madeline cookies

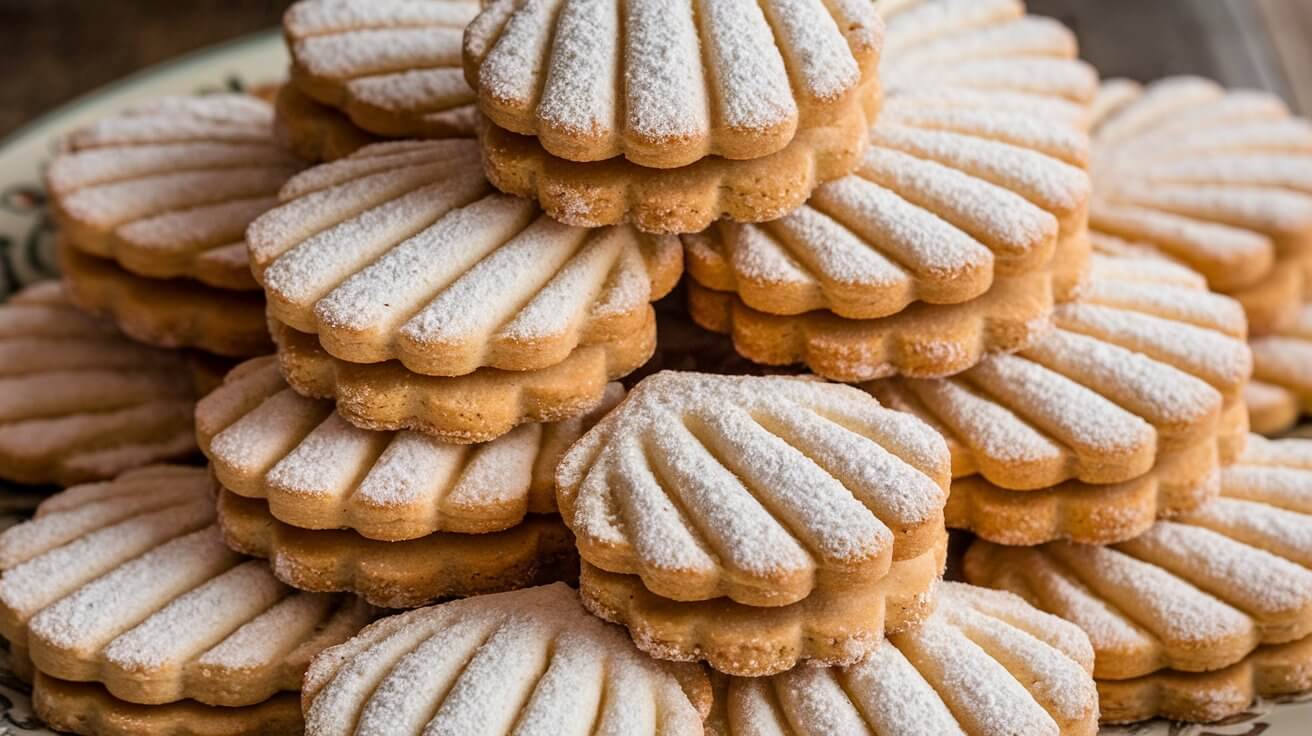
Madeline Cookies Recipe Using Cream – 5 Easy Steps for a Buttery Delight!

Introduction

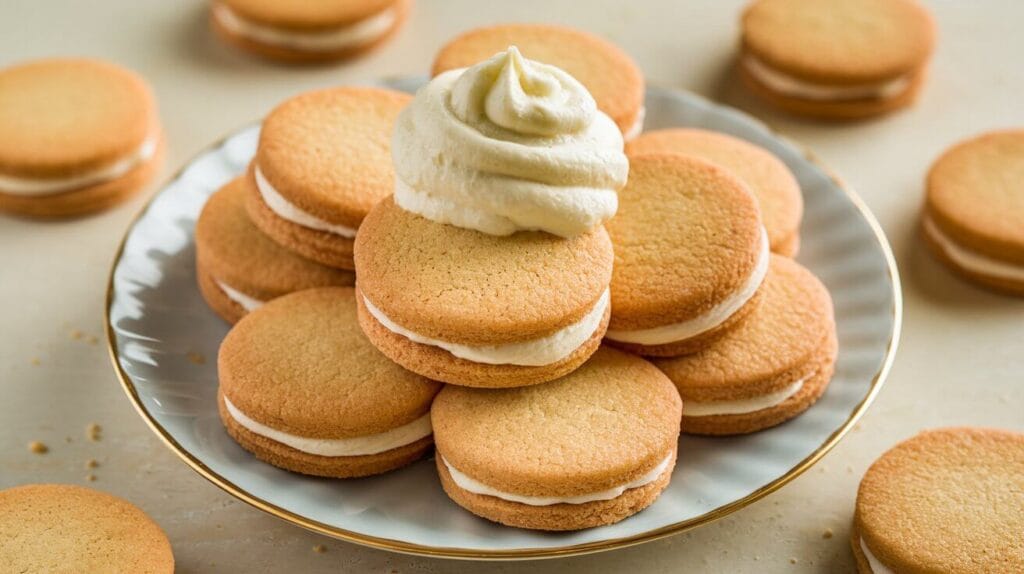
Madeline cookies are a classic French pastry that has captured the hearts of dessert lovers worldwide. Known for their delicate, spongy texture and iconic shell shape, Madelines are a treat that pairs perfectly with a cup of tea or coffee. While traditional Madeline recipes are already delightful, this version takes it up a notch by incorporating heavy cream into the batter. The result? A richer, creamier, and more tender cookie that melts in your mouth. Madeline Cookies Recipe Using Cream

In this comprehensive guide, we’ll walk you through everything you need to know about making Madeline cookies using cream. From the ingredients and step-by-step instructions to creative variations and FAQs, this article will equip you with all the knowledge you need to master this recipe. Whether you’re a seasoned baker or a beginner, this Madeline cookies recipe using cream is sure to impress.

Ingredients for Madeline Cookies Using Cream

To make the perfect Madeline cookies recipe using cream, you’ll need the following ingredients:

Wet Ingredients:

  • 3 large eggs: Eggs provide structure and help create the airy texture of Madelines.
  • ¾ cup granulated sugar: Adds sweetness and helps the cookies achieve a golden-brown color.
  • ½ cup heavy cream: The star ingredient that makes these cookies extra rich and tender.
  • 1 teaspoon vanilla extract: Enhances the flavor with a warm, aromatic note.
  • ½ cup unsalted butter (melted and slightly cooled): Adds richness and a buttery flavor.

Dry Ingredients:

  • 1 ½ cups all-purpose flour: The base of the cookie batter.
  • 1 teaspoon baking powder: Helps the cookies rise and become fluffy.
  • ¼ teaspoon salt: Balances the sweetness and enhances the flavors.

Optional Additions:

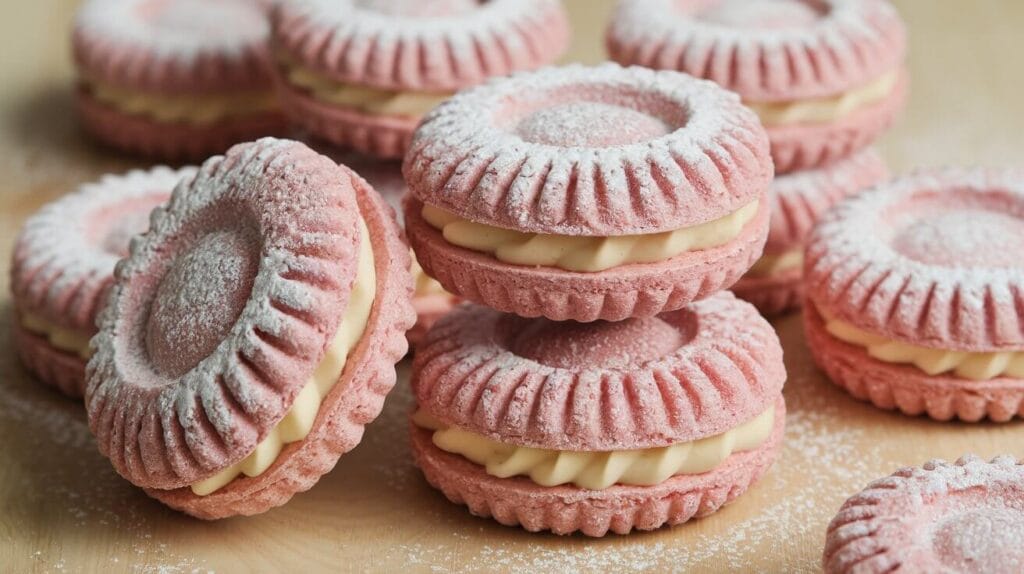
  • 1 teaspoon lemon zest: For a refreshing citrusy twist.
  • ¼ teaspoon almond extract: Adds a nutty, aromatic flavor.
  • Powdered sugar: For dusting the cookies before serving.
madeline cookies recipe

Step-by-Step Instructions for Madeline Cookies Recipe Using Cream

Step 1: Prepare Your Baking Tools

  • Preheat your oven to 375°F (190°C).
  • Grease and lightly flour a Madeline mold pan to prevent the cookies from sticking. If you don’t have a Madeline pan, you can use a mini muffin tin as a substitute.

Step 2: Whip the Eggs and Sugar

  • In a large bowl, beat the eggs and sugar together using an electric mixer for 3-5 minutes until the mixture becomes pale, thick, and fluffy. This step is crucial for creating the light and airy texture that Madelines are known for.

Step 3: Add the Cream and Vanilla

  • Slowly pour in the heavy cream while continuing to whisk the mixture.
  • Add the vanilla extract (and almond extract, if using) to enhance the flavor.

Step 4: Combine Dry Ingredients

  • In a separate bowl, whisk together the flour, baking powder, and salt. This ensures that the dry ingredients are evenly distributed.

Step 5: Fold in the Dry Ingredients

  • Gently fold the dry ingredients into the wet mixture using a spatula. Be careful not to overmix, as this can result in dense cookies. The goal is to maintain the airy texture.

Step 6: Add the Melted Butter

  • Slowly drizzle in the melted butter while folding gently to incorporate it into the batter. The butter adds richness and a buttery flavor to the cookies.

Step 7: Chill the Batter

  • Cover the bowl and refrigerate the batter for at least 30 minutes. Chilling the batter helps the cookies develop their signature domed shape and prevents them from spreading too much during baking.

Step 8: Bake the Madelines

  • Spoon the batter into the Madeline mold, filling each cavity about ¾ full.
  • Bake for 10-12 minutes, or until the edges are golden brown and the centers spring back when touched.

Step 9: Cool and Serve

  • Let the Madelines cool in the pan for 2 minutes, then transfer them to a wire rack to cool completely.
  • Dust with powdered sugar before serving for an elegant finish.
madeline cookies recipe using cream cake

Madeline Cookies Recipe Using Cream Cake – A Unique Twist

If you’re looking to switch things up, why not transform this recipe into a Madeline cookies recipe using cream cake? This variation is perfect for those who love the flavors of Madelines but prefer a cake format. Here’s how to do it:

Ingredients for Madeline Cream Cake:

  • Follow the same ingredients as the Madeline cookies recipe.
  • Add ½ cup sour cream for extra moisture and richness.
  • Use a cake pan instead of a Madeline mold.

Baking Instructions for Madeline Cream Cake:

  1. Prepare the batter as per the Madeline cookie recipe.
  2. Pour the batter into a greased 8-inch cake pan.
  3. Bake at 350°F (175°C) for 25-30 minutes, or until a toothpick inserted into the center comes out clean.
  4. Let the cake cool in the pan for 10 minutes, then transfer it to a wire rack to cool completely.
  5. Dust with powdered sugar before serving.

This variation creates a light, fluffy cake with the same delicate flavors of classic Madelines. It’s perfect for serving at tea parties or as a dessert for special occasions.

how to incorporate madeline cookies recipe using cream cake

How to Incorporate Madeline Cookies Recipe Using Cream Cake in Desserts

Madeline cookies and cream cake are incredibly versatile and can be used in a variety of creative desserts. Here are some fun and delicious ideas:

1. Madeline Cream Cake Trifle

  • Layer crumbled Madeline cake, whipped cream, and fresh berries in a glass trifle dish.
  • Repeat the layers until the dish is full, finishing with a layer of whipped cream and a sprinkle of powdered sugar.

2. Ice Cream Sandwiches

  • Freeze Madeline cookies and sandwich them with your favorite ice cream flavor.
  • Roll the edges in sprinkles or chopped nuts for a fun and festive treat.

3. Tiramisu-Style Madelines

  • Dip Madeline cookies in coffee or espresso and layer them with mascarpone cheese and cocoa powder.
  • Chill the dessert for a few hours to allow the flavors to meld together.

4. Chocolate-Dipped Madelines

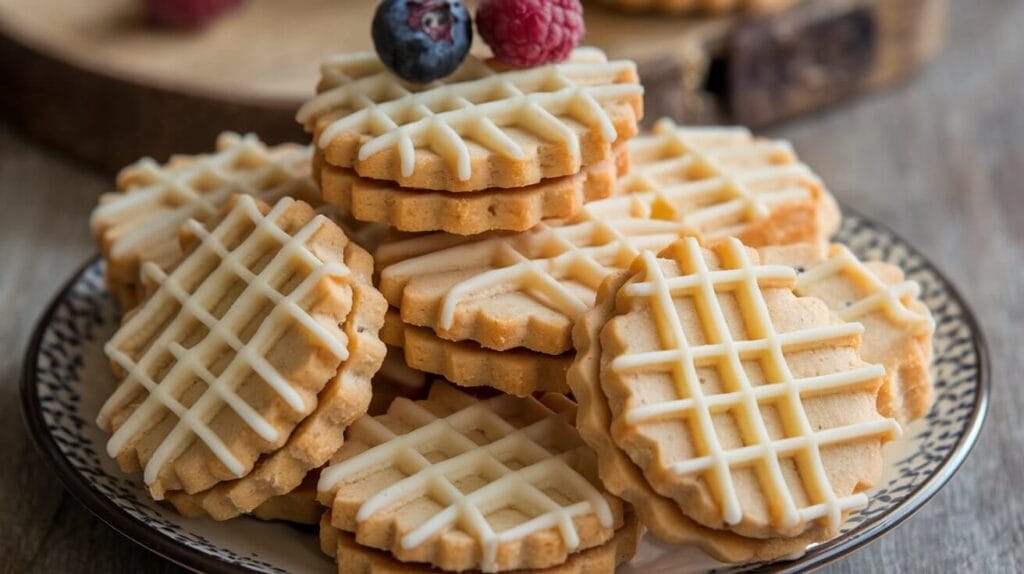
  • Melt dark or white chocolate and dip one side of each Madeline cookie.
  • Place the dipped cookies on a parchment-lined tray and let the chocolate set before serving.
  • Crush Madeline cookies and layer them with yogurt, honey, and fresh fruit in a parfait glass.
  • This makes for a light and delicious breakfast or snack option.
madeline cookies recipe using cream

French Butter Cake Cookies with Heavy Cream

Madeleine cookies are often described as a cross between a light sponge cake and a delicate butter cookie. The addition of heavy cream enhances their moistness and richness, giving them an even softer crumb. If you’re a fan of French butter cake cookies, this recipe is a must-try!

Classic Soft Madeleine Biscuits with Cream

Many people refer to these delightful treats as Madeleine biscuits, especially in European regions. The secret to achieving their signature soft texture lies in the careful folding of ingredients and proper chilling time. Using cream instead of milk makes them even more tender and flavorful. For more delicious dessert ideas, check out our collection of desserts with a twist.

Homemade Shell-Shaped Tea Cakes with a Creamy Texture

One of the best things about homemade shell-shaped tea cakes is their elegant presentation. These little pastries pair perfectly with a cup of tea or coffee, making them an ideal choice for brunch or afternoon tea gatherings. If you’re looking for quick and easy treats, explore more options in our quick & easy meals section.

Buttery Sponge-Like Pastries with a Velvety Taste

If you love buttery, sponge-like pastries, this variation with cream creates a velvety-smooth bite that melts in your mouth. You can customize the flavor by adding ingredients like vanilla bean, citrus zest, or even a hint of spice. For more soft and indulgent recipes, check out our special vegetarian & vegan treats that cater to all taste preferences.

FAQs

What makes this Madeline cookies recipe using cream different?

The addition of heavy cream makes the cookies extra soft, rich, and tender compared to traditional Madelines. The cream adds moisture and a luxurious texture that elevates the overall experience.

Do I need a special Madeline pan?

Yes, a Madeline mold pan is essential for achieving the signature shell shape. However, if you don’t have one, you can use a mini muffin tin as a substitute.

Can I use milk instead of cream?

While you can use milk, the texture will be less rich and soft. Heavy cream is recommended for the best results.

How do I store Madeline cookies?

Store the cookies in an airtight container at room temperature for up to 3 days or refrigerate them for up to 1 week.

Can I freeze Madeline cookies?

Yes! Place the cookies in a sealed bag or airtight container and freeze for up to 3 months. Thaw at room temperature before serving.

What flavors can I add to Madelines?

You can experiment with different flavors such as lemon zest, orange zest, almond extract, or even matcha powder for a unique twist.

Conclusion

This Madeline cookies recipe using cream is a delightful twist on a classic French pastry. The addition of heavy cream creates a richer, more tender cookie that’s perfect for any occasion. Whether you’re making traditional Madelines, a Madeline cream cake, or incorporating them into creative desserts, this recipe is sure to impress.

For more Madeleine variations, check out AllRecipes and Delish for additional inspiration.

Print

Madeline Cookies Using Cream

Delightful French pastries with a rich, tender texture due to the addition of heavy cream. Perfectly paired with tea or coffee.

  • Author: helth-recipe
  • Prep Time: 15 minutes
  • Cook Time: 12 minutes
  • Total Time: 57 minutes
  • Yield: 12 servings 1x
  • Category: Dessert
  • Method: Baking
  • Cuisine: French
  • Diet: Vegetarian

Ingredients

Scale
  • 3 large eggs
  • ¾ cup granulated sugar
  • ½ cup heavy cream
  • 1 teaspoon vanilla extract
  • ½ cup unsalted butter (melted and slightly cooled)
  • 1 ½ cups all-purpose flour
  • 1 teaspoon baking powder
  • ¼ teaspoon salt
  • 1 teaspoon lemon zest (optional)
  • ¼ teaspoon almond extract (optional)
  • Powdered sugar (for dusting)

Instructions

  1. Preheat your oven to 375°F (190°C) and grease a Madeline mold pan.
  2. In a large bowl, beat the eggs and sugar together for 3-5 minutes until pale, thick, and fluffy.
  3. Slowly whisk in the heavy cream and vanilla extract.
  4. In a separate bowl, whisk together the flour, baking powder, and salt.
  5. Fold the dry mixture into the wet mixture gently to combine.
  6. Drizzle in the melted butter while folding the batter.
  7. Refrigerate the batter for at least 30 minutes.
  8. Spoon the batter into the Madeline mold, filling each cavity about ¾ full.
  9. Bake for 10-12 minutes until golden brown and springy to touch.
  10. Let cool in the pan for 2 minutes, then transfer to a wire rack to cool completely and dust with powdered sugar before serving.

Notes

For variations, consider adding lemon zest or almond extract. These cookies can also be frozen for up to 3 months.

Nutrition

  • Serving Size: 1 cookie
  • Calories: 170
  • Sugar: 10g
  • Sodium: 60mg
  • Fat: 8g
  • Saturated Fat: 5g
  • Unsaturated Fat: 3g
  • Trans Fat: 0g
  • Carbohydrates: 24g
  • Fiber: 1g
  • Protein: 2g
  • Cholesterol: 40mg

Did you make this recipe?

Share a photo and tag us — we can't wait to see what you've made!

madeline cookies

Madeline Cookies Using Cream

Delightful French pastries with a rich, tender texture due to the addition of heavy cream. Perfectly paired with tea or coffee.
Prep Time 15 minutes
Cook Time 12 minutes
Total Time 57 minutes
Servings: 12 servings
Course: Dessert
Cuisine: French
Calories: 170

Ingredients
  

Wet Ingredients
  • 3 large large eggs Provides structure and helps create the airy texture.
  • ¾ cup granulated sugar Adds sweetness and helps achieve a golden-brown color.
  • ½ cup heavy cream Makes the cookies extra rich and tender.
  • 1 teaspoon vanilla extract Enhances the flavor with a warm, aromatic note.
  • ½ cup unsalted butter (melted and slightly cooled) Adds richness and buttery flavor.
Dry Ingredients
  • 1 ½ cups all-purpose flour The base of the cookie batter.
  • 1 teaspoon baking powder Helps the cookies rise and become fluffy.
  • ¼ teaspoon salt Balances the sweetness and enhances flavors.
Optional Additions
  • 1 teaspoon lemon zest For a refreshing citrusy twist.
  • ¼ teaspoon almond extract Adds a nutty, aromatic flavor.
  • powdered sugar For dusting the cookies before serving.

Method
 

Preparation
  1. Preheat your oven to 375°F (190°C) and grease a Madeline mold pan.
  2. In a large bowl, beat the eggs and sugar together for 3-5 minutes until pale, thick, and fluffy.
  3. Slowly whisk in the heavy cream and vanilla extract.
  4. In a separate bowl, whisk together the flour, baking powder, and salt.
  5. Gently fold the dry mixture into the wet mixture to combine.
  6. Drizzle in the melted butter while folding the batter.
  7. Cover the bowl and refrigerate the batter for at least 30 minutes.
Baking
  1. Spoon the batter into the Madeline mold, filling each cavity about ¾ full.
  2. Bake for 10-12 minutes until golden brown and springy to touch.
  3. Let cool in the pan for 2 minutes, then transfer to a wire rack to cool completely.
  4. Dust with powdered sugar before serving.

Notes

For variations, consider adding lemon zest or almond extract. These cookies can also be frozen for up to 3 months.

Similar Posts

  • Greek Yogurt Lemon Blueberry Pancake Bites

    Why Greek Yogurt Lemon Blueberry Pancake Bites Are The Ultimate Breakfast Hack How To Make Greek Yogurt Lemon Blueberry Pancake Bites Serving Suggestions: Pump Up The Pancake Bites My Actual Experience (Messy Kitchen Edition) Common Questions Ready For A Breakfast Glow-Up? Greek Yogurt Lemon Blueberry Pancake Bites have basically rescued my morning routine more than once. There’s just something about craving a pancake breakfast but hating the whole flipping and babysitting-the-pan thing. Maybe you know the struggle too. Mini pancake bites? Way less drama. These things are bright, poppable, and honestly? They feel a little fancier than cereal but way less work than full-on pancakes. this … Why Greek Yogurt Lemon Blueberry Pancake Bites Are The Ultimate Breakfast Hack Alright, real talk. I used to skip breakfast. Always running late, or leaving the house with just coffee. Then these Greek Yogurt Lemon Blueberry Pancake Bites showed up in my life. They’re soft, a little tangy, fruity—but they’re not like dessert-for-breakfast sweet. The Greek yogurt keeps them super moist and gives a bit of protein too, so I don’t get that carb crash. Plus, I can make a whole batch ahead of time. The first time I brought a baggie to work, I felt like I’d hacked breakfast. You get the lemon, that zing, plus blueberries in every bite. Don’t even get me started on how good they smell. I’d argue these are way easier (and tastier!) than standing by a stove, waiting for each pancake to bubble. How To Make Greek Yogurt Lemon Blueberry Pancake Bites Getting these babies in the oven is honestly not rocket science. You’ll need a mixing bowl, a muffin pan (mini or regular, whatever you’ve got), and…that’s it. Start with your favorite pancake mix as a base if you’re short on time. In a bowl, mix together the following: Greek yogurt (I use plain, but I’ve done vanilla in a pinch and it’s awesome) An egg (this helps things stick; don’t skip it) A dash of vanilla extract, for the cupcake-y vibes Freshly squeezed lemon juice and a little zest for extra zing Blueberries (fresh is magical, but frozen works—don’t even sweat it) Once the batter’s done, just spoon it into the muffin tin and pop in the oven (I usually set it to 350°F). Bake about 12-15 minutes, until the tops are golden. Sometimes mine look a little wonky on top, but that’s just pancake personality. Ingredient What It Adds Swaps Pro Tip Greek Yogurt Moisture & protein Plain yogurt Thicker yogurt = fluffier bites Lemon Zesty flavor Lime Zest first, then juice Blueberries Sweet, juicy pops Raspberries Dust with flour to stop sinking Serving Suggestions: Pump Up The Pancake Bites Let’s be honest, Greek Yogurt Lemon Blueberry Pancake Bites taste amazing fresh from the oven. But if you want to jazz them up, here you go: Dip them in maple syrup for dessert-vibes Toss them in a lunchbox for a sweet surprise Freeze extras and pop them in the microwave for a busy day You can also crush some with a fork, add a dollop of extra Greek yogurt, and call it a deconstructed parfait if you’re feeling extra. My Actual Experience (Messy Kitchen Edition) So, here’s the honest scoop. The first time I made Greek Yogurt Lemon Blueberry Pancake Bites, I totally overfilled the muffin cups. Half the batch puffed up wild, like little volcanoes. My kitchen smelled like Sunday brunch at a fancy B&B, though, and that kind of made up for the mess. The flavor? Legit. Zingy lemon hits first, then the blueberry pops bring it all together with the creamy background from the yogurt. These don’t last more than a day at my house—my sister snags them before I can even pack lunch. “These are so good, I started making them for my kids’ breakfast, and now my husband takes them for his coffee break too. Minimal mess, major win—thanks for sharing!” – Lara, real-life reader and pancake-bite convert Common Questions Q: Can I use flavored Greek yogurt? A: Yes! Strawberry or vanilla Greek yogurt is delicious. Just watch out for extra sweetness. Q: What if I don’t have fresh lemons? A: Use bottled lemon juice. Not as bright, but hey, it gets the job done. Q: Will these work with gluten-free flour? A: Absolutely. I’ve swapped in gluten-free mix and the bites came out puffy and soft. Q: Can I freeze these little bites? A: You bet. They reheat so well. Just zap them in the microwave for 20 seconds. Q: My blueberries sink to the bottom. Any fix? A: Toss them in a bit of flour before mixing in. Old baker’s trick, easy win. Ready For A Breakfast Glow-Up?…

  • Almond Flour Scones

    Almond Flour Scones are basically my “I forgot to bake and now someone’s coming over for coffee” cheat code. You know that feeling when you want to serve something homemade, but you also want it to be, well, kinda healthy? Yeah, me too. That’s when I drag out my bag of almond flour and basically magic up a batch of these beauties. They’re honestly so easy, you almost feel like you’re getting away with something. No one has to know you made them while the kettle’s heating.   Almond Flour Scones: Why I’m Obsessed Okay, let me level with you. I’ve made more scone recipes than I can count—some with enough butter to terrify my doctor—and yet, almond flour scones keep sneaking back into my kitchen lineup. For starters, almond flour just makes them crazy tender. We’re talking soft, ever-so-slightly nutty, and not dry at all. Plus, they don’t taste “grain-free” (you know that weird sandy thing some healthy recipes have? Gone). They’re super quick too. Like, measure, mix, plop onto a baking sheet, and done. Oh, and if you ask me, they turn out way fancier than the level of effort required. And let’s talk aroma—the scent while these bake will have people drifting into your kitchen, guaranteed. Seriously, almond flour scones could win awards just on fragrance. “I’m always looking for gluten-free bakes that don’t taste weird. These are PERFECT. Moist and taste just like the real deal. They freeze great too!” – Anna, actual almond flour scone lover     Key Ingredients for Almond Flour Scones Let’s keep this simple. You literally need stuff you probably already have hanging around, if you do any gluten-free or lower-carb baking. Almond flour: Make sure it’s finely ground (not almond meal). The texture matters. Baking powder: Helps the scones puff up a bit. Don’t skip! Eggs: For binding everything together. If you want extra richness, add an extra yolk (yep, I do sometimes). Butter: Cold is best. This gets you those lovely soft scone insides. Sweetener: Sugar, honey, or a sugar replacement all work here. Use what you like. Add-ins: Think dried fruit, chocolate chips, or even a sprinkle of cinnamon. These scones are not picky. I mean, if you want to get fancy, add lemon zest or a handful of berries, but honestly? Even plain, almond flour scones are pretty epic. How to Make Almond Flour Scones (Short Version: It’s Actually Easy) If you can stir, you can make these. Here’s the breakdown: First, mix your dry stuff—almond flour, baking powder, and whatever sweetener you’re using. Next, drop in the cold butter and squish it in with your fingers (messy, but also kinda fun, I won’t lie). Once it looks like crumbs, add the eggs and any extras. Stir it up until just blended. Now, don’t overthink it. Scoop your dough onto a parchment-lined tray. Shape it quickly—don’t fuss. Slice into wedges (or make little mounds if you’re lazy, I won’t tell). Bake around 20 minutes at 350°F until they’re just golden. Once they’re out, resist the urge to eat one right away. Let them cool. (Trust me, they hold together better if you wait.) Serving Suggestions So, almond flour scones are basically a blank canvas for whatever you’re in the mood for: Slather with jam or nut butter for a classic vibe. Pair with coffee, tea, or even a glass of icy almond milk. Go wild with a drizzle of honey and a pat of butter for five-star restaurant feels. If you’re feeling brave, split them open and fill with berries and whipped cream. Real talk: breakfast, snack, or dessert—these fit anywhere. Common Questions Why almond flour instead of regular flour? I like the flavor and the softer texture, plus it’s gluten-free and just a bit healthier (for my conscience at least). Do almond flour scones taste sweet? They’re lightly sweet, but not dessert-sweet. You control the sugar, so tweak for your taste buds. Can I freeze almond flour scones? Absolutely! Toss ’em in a zip bag. Toast straight from the freezer later. Lazy day win. What if mine are too crumbly? Try another egg or add a spoonful of yogurt next time. Almond flour’s different than wheat flour, so sometimes you gotta play around. Is it easy to swap add-ins? Oh, you bet. Chocolate, fruit, nuts—throw in whatever you love. Just avoid lots of wet add-ins so things don’t get soggy. Ready to Try Almond Flour Scones? Okay, so you don’t have to be a baking superstar to knock out almond flour scones, and nobody’s going to believe you whipped them up last minute. No mixer, barely any mess. If you want to master the almond flour scone life, this quick video walks you through it, or peek at the almond flour scone FAQ for more pointers. Next time you’re stumped for what to serve with afternoon tea or, you know, just feeling snacky, give these a shot. Don’t wait for a special occasion, just go for it. If you do, I promise you’ll be passing this little trick along to every friend who drops by unexpectedly. These Almond Flour Scones are delightfully soft, tender, and naturally gluten-free….

  • Healthy Peanut Butter Greek Yogurt Banana Bread Muffins

    What Makes These Muffins Healthy Anyway? How to Make Healthy Peanut Butter Greek Yogurt Banana Bread Muffins Serving Suggestions Real Results: A Quick Table for Muffin Nerds Common Questions Give These Muffins a Shot (Seriously) Ever find yourself standing in the kitchen, bananas going mushy on the counter, trying to talk yourself out of just tossing them? Me too. Enter my go-to hero: Healthy Peanut Butter Greek Yogurt Banana Bread Muffins. These are what I grab when I want something a little sweet, a little wholesome, and—bonus points—they actually fill you up without that sugar crash. They’re just different enough to keep breakfast (or, let’s be real, midnight snacking) from getting boring. These muffins nail that perfect balance of soft, nutty, and satisfying. No more staring at sad bananas wishing for a miracle. Here it is.   What Makes These Muffins Healthy Anyway? People always ask if a muffin can be healthy. Yes, absolutely, these are not your run-of-the-mill, cake-in-disguise muffins. The trick is in the swap outs. Instead of using a pile of butter, I mix in creamy Greek yogurt for that soft texture. Not only does it keep these muffins moist (I mean, who likes dry muffins?), it packs in a little protein too. Peanut butter… I’m obsessed, and it brings healthy fats that do more than just taste good. I’ll be honest, keeping the sugar low here makes me feel pretty smug. The ripe bananas do most of the sweet talking. And hey, you’re getting fiber from whole wheat flour if you want to take it up a notch. This is the kind of snack that isn’t gonna wreck your day but actually makes breakfast feel like you’re doing something good for yourself.   How to Make Healthy Peanut Butter Greek Yogurt Banana Bread Muffins You won’t need anything fancy here. I usually grab two bowls—one for dry, one for wet—and that’s about it. Mash up your bananas (the browner, the better. I’m weirdly proud when mine look almost scary). Stir the Greek yogurt, peanut butter, and a splash of vanilla into the banana, then mix your flour and the usual baking essentials together in a different bowl. Pour the wet stuff into the dry and combine just until you can’t see flour. Please, trust me, do not over-mix. That’s how you get rubbery muffins and nobody wants that. Scoop into muffin cups and bake. My oven claims it’s 350°F, but check yours. My sister’s runs hot and her muffins burned once. Here’s where I get creative—sometimes I pop a few chopped walnuts on top, or even a sprinkle of dark chocolate chips if I’m feeling fancy. Do what makes you happy. They puff up, crack a little on top, and the kitchen smells like peanut butter dreams. Serving Suggestions I may be dramatic, but these Healthy Peanut Butter Greek Yogurt Banana Bread Muffins are a legit game changer. Here’s what I love: Warm from the oven with a dab of extra peanut butter—true happiness. Sliced with a drizzle of honey or a little cinnamon. Oof, so good. Freeze a batch for busy mornings or snack emergencies. Super flexible, right? I’ve even snuck ’em into a couple of kids’ lunchboxes… zero complaints so far. Real Results: A Quick Table for Muffin Nerds Here’s a non-boring table to help you size up these muffins at a glance (because some of us need to know): Ingredient Focus Why It’s Good Texture Boost Nutrition Perk Greek Yogurt Swaps out oil/butter Makes it super moist Extra protein hit Peanut Butter Healthy fats, duh Nutty depth Satiety (it fills you up!) Banana Natural sweetener Soft muffin vibe Fiber & potassium “I tried these after you posted on your Insta, and oh man—they actually tasted like dessert but kept me full through my morning workout. My kids wolfed them down. Total win.” – Jen L. Common Questions Q: Can I use any kind of Greek yogurt? A: I stick with plain, low-fat Greek yogurt, but full-fat works if you want a richer muffin. Just don’t use the super runny kind. Q: What if I only have regular flour? A: That’s no big deal. Whole wheat just adds a little more fiber, but all-purpose flour works fine. Q: Can you freeze these muffins? A: Absolutely. I wrap them up, toss ’em in the freezer, then reheat in the microwave. Perfect for lazy days. Q: Will chunky or creamy peanut butter work best? A: Totally up to you. Creamy blends smoother, but I love the little peanut bits you get from the chunky kind. Q: How ripe do my bananas need to be? A: Go as ripe as possible. If they look a little scary, you’re on the right track. The flavor will be way deeper. Healthy Peanut Butter Greek Yogurt Banana…

  • Banana Blueberry Baked Oatmeal

      Why I’m Obsessed with Banana Blueberry Baked Oatmeal What You’ll Need For Banana Blueberry Baked Oatmeal How To Make It — My No-Stress Steps Serving Suggestions: How I Make Mine Extra Table: Quick Stats & Need-to-Know Facts Real People Love It Common Questions A Breakfast Worth Waking Up For Ever wake up craving breakfast that’s healthy but also feels a little extra? Banana Blueberry Baked Oatmeal totally gets the job done. You get this cozy, fruity hit from bananas and blueberries, but also big-time oats to keep you full. Oh, and it’s crazy easy to throw together. Like, you could probably make it half-awake (speaking from experience). This recipe saved me on busy mornings more times than I’d admit.   Why I’m Obsessed with Banana Blueberry Baked Oatmeal I honestly didn’t mean to fall in love with Banana Blueberry Baked Oatmeal. At first, I just wanted something I could meal-prep and microwave later—because who has time to cook fresh every day? Then I tasted it. Wow. The bananas get all caramel-y and sweet, almost like dessert. The blueberries pop (sometimes literally) and make everything juicy. That combo feels fancy but trust me, it’s the total opposite of high-maintenance. Make it for brunch, make it for weekday breakfast, even take it on picnics—this stuff is like a breakfast Swiss Army knife. I’ve made it so many times I eyeball the ingredients now. Honestly, my kids fight over the last piece. That’s when you know it’s good. What You’ll Need For Banana Blueberry Baked Oatmeal Okay, here’s what goes in it. I keep these ingredients stocked now, since Banana Blueberry Baked Oatmeal is a regular ask: Rolled oats: Old-fashioned ones work best Overripe bananas: Like, practically brown. The mushier, the better Fresh or frozen blueberries: Both do the trick Milk (dairy or not, your call) Eggs A splash of vanilla Some maple syrup (or honey) Baking powder Cinnamon, if you’re fancy Pinch of salt Toss all that in, and you’re basically guaranteed breakfast success. How To Make It — My No-Stress Steps I’ll be real: even if you mess up, Banana Blueberry Baked Oatmeal kinda forgives you. Here’s how I do it: First, mash your bananas in a big bowl. It’ll look messy. That’s fine. Whisk in the eggs, milk, maple syrup, and vanilla until you have a gloppy (kinda gross-looking, but trust me) soup. Dump in the oats, cinnamon, baking powder, and salt. Stir well—really scrape that bowl. Fold in the blueberries. If some of them smash, that’s even better. Swirly blue streaks look cool. Pour this into a greased baking dish. I like mine deep (for thick slices). Bake until the top looks a little golden and the middle isn’t wobbly. Usually about 35 minutes, but check your oven—it has a mind of its own sometimes. Let it cool a bit unless you enjoy burning your tongue (I never learn). Serving Suggestions: How I Make Mine Extra Drizzle extra maple syrup on top. Because, duh. Dollop some Greek yogurt or whipped cream on your Slice if you’re feeling wild. Have it cold from the fridge or warmed up in the microwave—the texture is different but good both ways. Toss on some chopped nuts for crunch (pecans make it feel five-star restaurant level).   Table: Quick Stats & Need-to-Know Facts Here’s a super simple look at Banana Blueberry Baked Oatmeal: Aspect Detail Why It Matters Tips Prep Time 10 minutes Super quick, even on Mondays Mash bananas ahead Bake Time 35 minutes Hands-off; tidy up while it bakes Use toothpick to check doneness Servings 6-8…