Banana Peanut Butter Yogurt Bowl topped with banana slices and creamy peanut butter.

Banana Peanut Butter Yogurt Bowl

Banana Peanut Butter Yogurt Bowl is basically my go-to answer for those days when nothing in the kitchen makes sense and my stomach is doing somersaults. You want a snack that actually hits the spot, right? Not one of those air-puffed “healthy” things people pretend taste good, but don’t. Sometimes I start craving dessert, sometimes I just want real food fast.

That’s when this bowl saves the day. If you want to switch it up later on, you can check out these healthy peanut butter greek yogurt banana bread muffins for another snack idea.

Banana Peanut Butter Yogurt Bowl

Banana Peanut Butter Yogurt Bowl

Healthy Snacking Tips

Let’s be honest. Figuring out what to eat between meals is a real struggle, especially if you’re stuck at your desk or running around. The Banana Peanut Butter Yogurt Bowl is a quick fix that actually fills you up. It’s got protein, it’s got healthy fat, and you get that natural sweetness from bananas. That combo always seems to keep my energy steady. One tiny tip if you’re craving more crunch: sprinkle in some granola or chia seeds. Nuts work too! Seriously, toss whatever’s in your pantry.

Sometimes I worry about boring old snacks but this little bowl? It never lets me down. You can even prep it the night before and just grab it from the fridge. I’ve also thrown in dark chocolate chips when I’ve needed, let’s say, a little “extra motivation” for stressful afternoons. (Okay, maybe more often than I want to admit.)

Don’t overthink this. Use what you have. Snack smarter, not harder.

“I was skeptical at first, but now I make these bowls three times a week. It’s so much better than a bland protein bar. Game changer!” – Megan L., reader

Banana Peanut Butter Yogurt Bowl

Is it okay to have a late night snack?

Honestly? Your body, your rules. If you’re hungry before bed, you probably need energy. As much as the internet tries to guilt-trip us about eating after 8 p.m., a Banana Peanut Butter Yogurt Bowl is actually a pretty chill nighttime snack. The protein and healthy stuff in yogurt and peanut butter keep you full longer so you won’t wake up ready to eat your pillow.

Plus, there’s no giant sugar spike. No judgement here, friend! Just avoid gigantic bowls… unless you’re really starving. Late night, I sometimes eat this with a handful of berries, and it feels sort of indulgent without being wild.

Not to oversell, but sometimes it’s the most satisfying five-minute decision of my day.

Banana Peanut Butter Yogurt Bowl

What do I need to make Peanut Butter Banana Greek Yogurt Bowls?

Let’s keep this ultra-straightforward because there are too many recipes out there with mystery ingredients. Here’s all you really need:

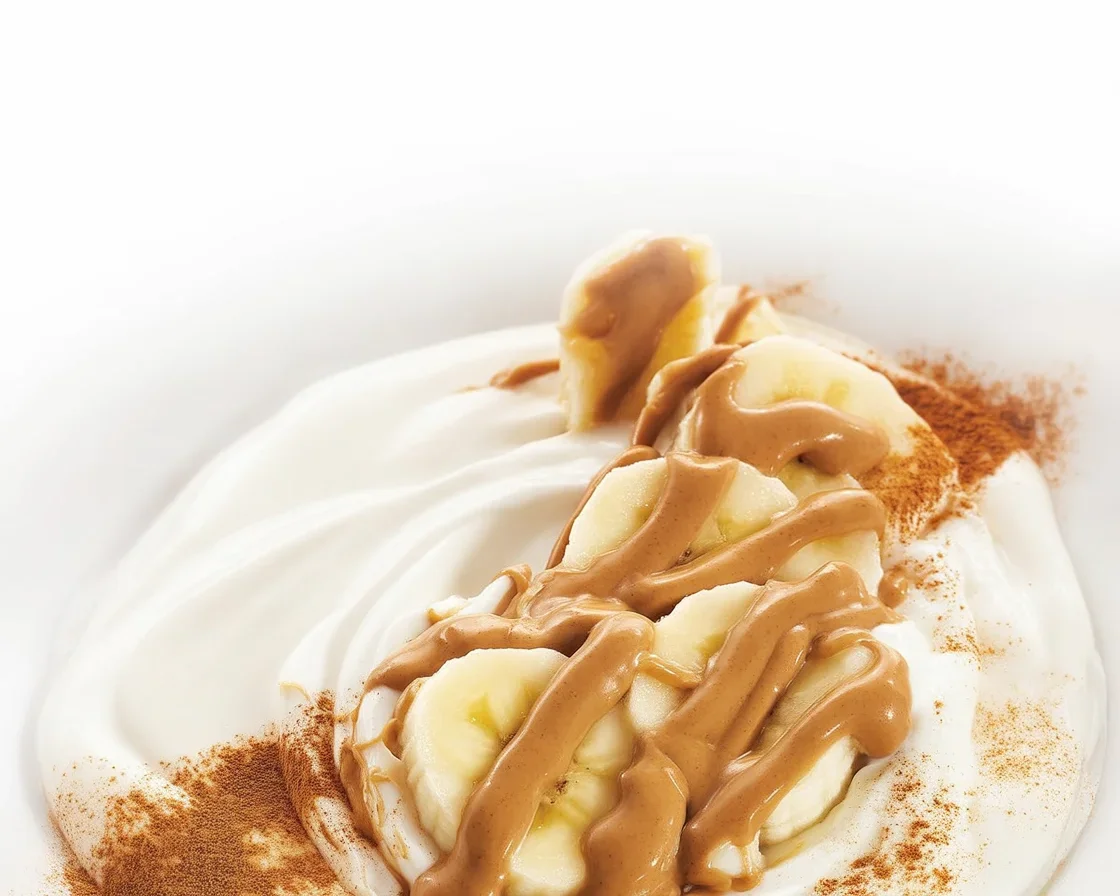
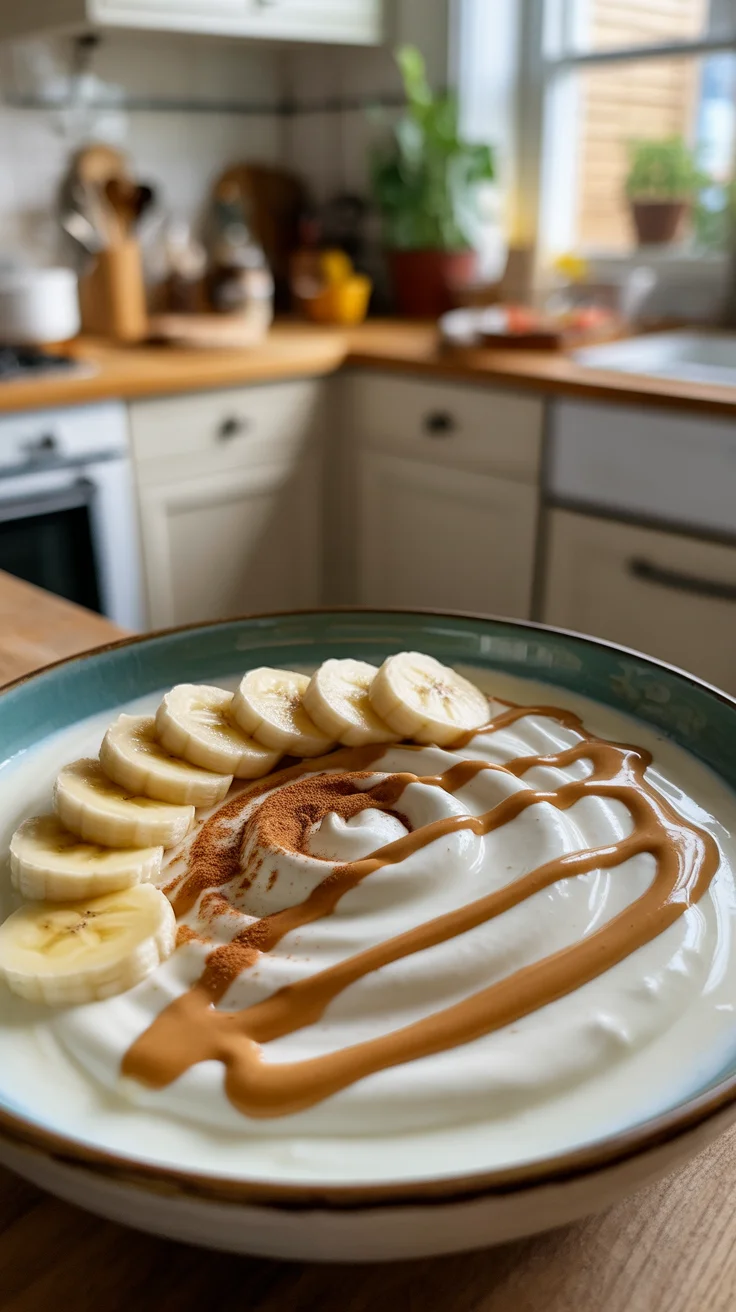
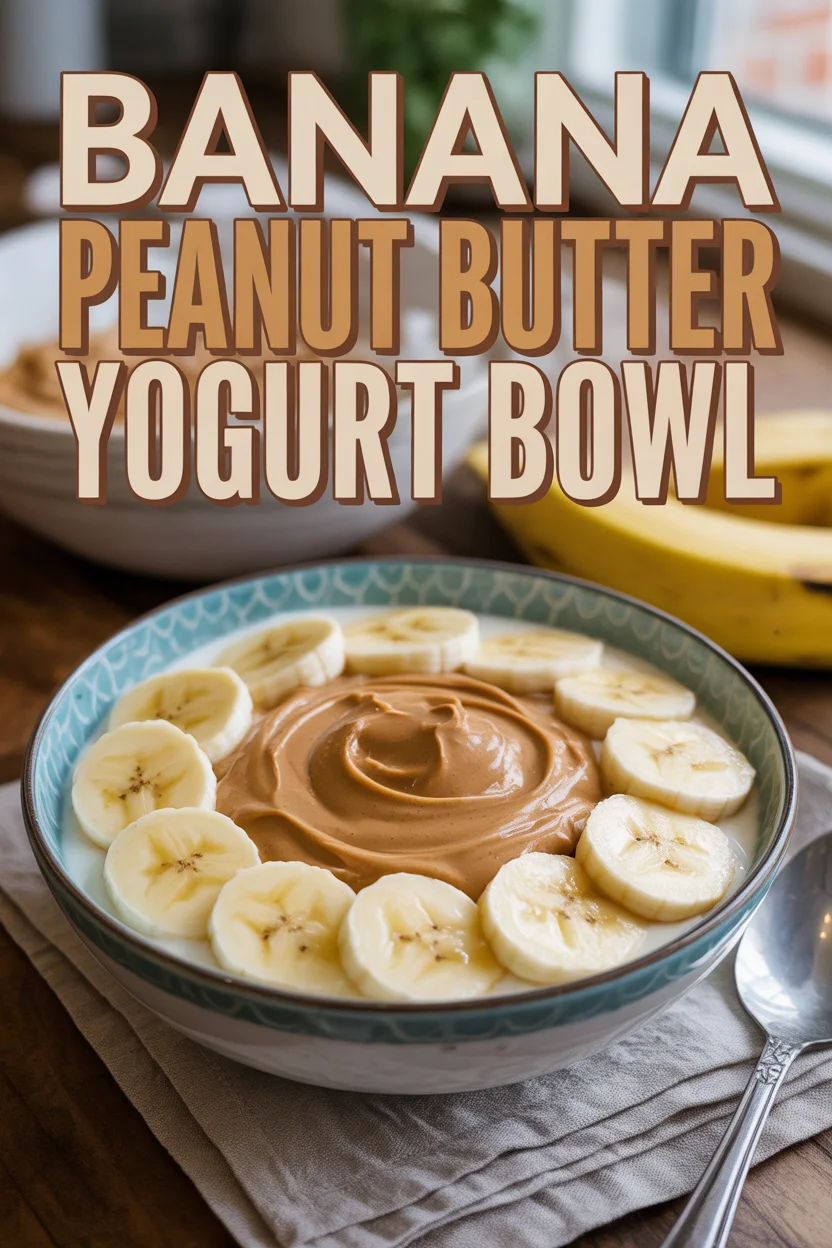
  • Greek yogurt (vanilla or plain, your pick)
  • Ripe banana (the more spots, the sweeter)
  • Peanut butter (creamy or crunchy doesn’t matter)
  • Honey (totally optional if you like it sweeter)
  • Toppings: chia seeds, granola, nuts, or a sprinkle of cinnamon

Literally, that’s it. All stuff you maybe already have, unless you’re out of bananas… and then, well, that’s a grocery list for tomorrow.

Banana Peanut Butter Yogurt Bowl

How to Make this Peanut Butter Banana Greek Yogurt Bowl

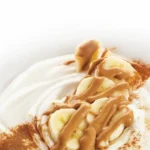
Ready? This is the part where I almost feel silly writing out “instructions.” It’s ridiculously simple. Scoop a generous pile of greek yogurt into your bowl. Slice up a banana (no need for perfect rounds, messy is fine). Dollop or swirl peanut butter all over the top. If you’re craving it, a quick swirl of honey isn’t going to hurt anyone. Add your favorite toppings (chia, granola, chocolate chips if you’re wild). Boom. Done. Sit down and enjoy something that tastes like a five-star dessert but takes five minutes to make.

You can even meal-prep these by building them in mason jars for a grab-and-go win. And, hey, kids will eat these if you’re battling snack time at home. Foggy-headed mornings or rushed school drop offs? This has saved me more times than I want to count.

Banana Peanut Butter Yogurt Bowl

More Recipes to Try

Alright, so maybe you’ve gotten hooked on the Banana Peanut Butter Yogurt Bowl and you want to shake up your list of easy snacks. Welcome to the club. If you want to branch out just a tiny bit, here’s what I suggest:

  • Try making peanut butter date energy rolls. They’re perfect for those grab-it-and-go mornings when you know you’ll need something in your bag for later.
  • Craving chocolate? Look up a keto peanut butter chocolate fat bombs recipe. That’ll hit your sweet tooth in the best way while being weirdly filling.
  • Feeling bold? Peanut butter earthquake cake is unapologetically fun, a little messy, and definitely worth the kitchen clean-up.

If you’re the kind of person who likes surprises (I’m 50-50), the world of peanut butter snacks is delightfully massive. So many ways to keep snack time interesting.

Banana Peanut Butter Yogurt Bowl

So, next time you’re staring blankly into the fridge, remember the magic of a Banana Peanut Butter Yogurt Bowl. If you can’t get enough, trust me, there are even more creative takes at Peanut Butter Banana Greek Yogurt Bowl – The Lemon Bowl®, and for snackers who want their bowl to taste just a little bit more like dessert, you’re not alone. Life’s too short for boring snacks!

Banana Peanut Butter Yogurt Bowl

Banana Peanut Butter Yogurt Bowl

A quick, satisfying snack that combines Greek yogurt, ripe bananas, and peanut butter for a delicious treat anytime.
Prep Time 5 minutes
Total Time 5 minutes
Servings: 1 bowl
Course: Breakfast, Snack
Cuisine: American
Calories: 350

Ingredients
  

Main Ingredients
  • 1 cup Greek yogurt (vanilla or plain)
  • 1 medium ripe banana The more spots, the sweeter!
  • 2 tablespoons peanut butter Creamy or crunchy
  • 1 tablespoon honey Optional for added sweetness
Toppings
  • to taste chia seeds
  • to taste granola
  • to taste nuts
  • to taste cinnamon A sprinkle
  • to taste dark chocolate chips Optional, for an indulgent touch

Method
 

Preparation
  1. Scoop a generous pile of Greek yogurt into your bowl.
  2. Slice up a ripe banana and add it to the bowl.
  3. Dollop or swirl peanut butter all over the top.
  4. If desired, add a quick swirl of honey for sweetness.
  5. Top with your favorite toppings such as chia seeds, granola, or chocolate chips.
  6. Sit down and enjoy your Banana Peanut Butter Yogurt Bowl!

Notes

Prep the bowl the night before for an easy grab-and-go snack. Kids will also enjoy this tasty option during snack time.

Similar Posts

  • Oatmeal Waffles

    Oatmeal Waffles have saved my breakfast routine more times than I can count! You know those mornings when you roll out of bed, craving something a little different, maybe even a little fun, but nothing too fussy? That’s when I whip out my trusty recipe. These guys are easy, pretty healthy, and don’t taste like…

  • A Good Breakfast for an Athlete: 10 Powerful Meals to Fuel Performance

    Introduction Athletes need proper fuel to optimize their performance, and that begins with breakfast. A well-balanced morning meal sets the tone for the day, providing the necessary energy, nutrients, and hydration. But what is a good breakfast for an athlete? The right combination of carbohydrates, proteins, and healthy fats can enhance endurance, speed up recovery,…

  • healthy Orange Scones

    Why You’ll Fall for These Orange Scones The Simple Ingredients You Actually Need Step-By-Step: Bringing Orange Scones to Life Serving Suggestions To Level Up Common Questions Go On, Make Your Mornings Way Less Boring Orange Scones are kinda magical when you want something quick for breakfast, but also wanna trick your brain into thinking you’re at a five-star restaurant. Ever drag yourself outta bed and just want a treat to make the day less… meh? Yep, been there. I actually started making these because regular scones got way too boring and, okay, my neighbor wouldn’t stop bragging about her “famous” lemon version. Orange scones hit different. Seriously, that citrusy thing going on is just—wow. If you’re tired of sad donuts or cold cereal, let’s get you sorted out right here.   this … Why You’ll Fall for These Orange Scones Listen, nobody wants a dry, crumbly brick on the plate. The whole idea is to get a scone that’s bright and soft on the inside, with just a hint of gold crunch outside. These orange scones are super easy, too. I’m not just saying that—real talk, my thirteen-year-old cousin bakes them without setting off the smoke alarm. You don’t need a mixer. You don’t even need fancy tools. Mixing with your hands is cool (honestly, it’s kinda therapeutic). The burst of orange makes the kitchen smell like living inside a fruit basket. Sometimes I toss in a handful of chocolate chips, but don’t tell the purists. Go wild with the zest. I always say, “More zest, more best!” There’s science somewhere about citrus making you happy—I say just trust the process.   The Simple Ingredients You Actually Need Here’s the best part: most of this stuff’s already hanging out in your kitchen right now. Really. You’ll need: All-purpose flour—yep, nothing fancy Cold butter (don’t you dare soften it) White sugar and a little pinch of salt (don’t skip this) A juicy orange (zest and juice both, please) Milk or cream (either’s fine—don’t overthink) Baking powder for the puff Maybe an egg, if you’re feelin’ extra Mix this all up and try not to eat the dough raw. Old habits die hard.   Step-By-Step: Bringing Orange Scones to Life First thing, crank up your oven. You want it hot—about 400°F. While it’s preheating, grab a big bowl. Dump in your flour, sugar, baking powder, and salt. Now toss those cold, cubed butter pieces in. Cut them in with your fingers or a pastry cutter, and don’t stress if a few chunks are bigger. Grate in all that lovely orange zest (seriously, let’s not be stingy). Pour in juice and milk (I splash both instead of measuring). If you’re using an egg, whisk and add now. Stir until just combined. Don’t you dare overmix. Plop dough on a floured counter, pat into a messy round disk (about an inch thick), and slice it like a pizza. The rougher the cut, the more rustic and bakery-looking. Set on a sheet lined with parchment. Brush tops with more milk (makes ’em golden). Bake 13-15 minutes till just lightly brown. Let cool for a hot second before eating so you don’t burn your tongue (again… it happens, trust me).   Serving Suggestions To Level Up Top with orange glaze or drizzle with melted chocolate if feeling snazzy. Serve warm with real butter—never margarine, come on now. Toss leftovers in the toaster next morning for a crispy redo. Pair with strong coffee or black tea to cut the sweetness. Common Questions Can I make orange scones ahead of time? Absolutely! I usually bake extra and freeze a few. Just let ’em cool first, then wrap tight. Reheat in oven for a just-baked feel. What if I only have mandarins or clementines? No problem. Go for it. The flavor will be a titch sweeter, but honestly, you might like that better. How do I stop them from being too dry? Don’t overmix the dough and make sure your butter is cold. A little drizzle of extra cream on top before baking never hurts. Do I need a glaze? Nope! I’m team “depends on my mood.” Sometimes a broken scone and a pat of butter is all you need. But a simple orange-powdered sugar glaze makes them café-level. Can I use store-bought orange juice? Eh. Sure, if you’re in a pinch. But fresh is way, way better. You’ll notice the zing. I’ve tried probably fifteen recipes, but this one? Perfection. My husband asked if I bought them from that expensive bakery down the street. Nope, just my own two hands! – Dani M., Vermont…

  • Almond Flour Scones

    Almond Flour Scones are basically my “I forgot to bake and now someone’s coming over for coffee” cheat code. You know that feeling when you want to serve something homemade, but you also want it to be, well, kinda healthy? Yeah, me too. That’s when I drag out my bag of almond flour and basically magic up a batch of these beauties. They’re honestly so easy, you almost feel like you’re getting away with something. No one has to know you made them while the kettle’s heating.   Almond Flour Scones: Why I’m Obsessed Okay, let me level with you. I’ve made more scone recipes than I can count—some with enough butter to terrify my doctor—and yet, almond flour scones keep sneaking back into my kitchen lineup. For starters, almond flour just makes them crazy tender. We’re talking soft, ever-so-slightly nutty, and not dry at all. Plus, they don’t taste “grain-free” (you know that weird sandy thing some healthy recipes have? Gone). They’re super quick too. Like, measure, mix, plop onto a baking sheet, and done. Oh, and if you ask me, they turn out way fancier than the level of effort required. And let’s talk aroma—the scent while these bake will have people drifting into your kitchen, guaranteed. Seriously, almond flour scones could win awards just on fragrance. “I’m always looking for gluten-free bakes that don’t taste weird. These are PERFECT. Moist and taste just like the real deal. They freeze great too!” – Anna, actual almond flour scone lover     Key Ingredients for Almond Flour Scones Let’s keep this simple. You literally need stuff you probably already have hanging around, if you do any gluten-free or lower-carb baking. Almond flour: Make sure it’s finely ground (not almond meal). The texture matters. Baking powder: Helps the scones puff up a bit. Don’t skip! Eggs: For binding everything together. If you want extra richness, add an extra yolk (yep, I do sometimes). Butter: Cold is best. This gets you those lovely soft scone insides. Sweetener: Sugar, honey, or a sugar replacement all work here. Use what you like. Add-ins: Think dried fruit, chocolate chips, or even a sprinkle of cinnamon. These scones are not picky. I mean, if you want to get fancy, add lemon zest or a handful of berries, but honestly? Even plain, almond flour scones are pretty epic. How to Make Almond Flour Scones (Short Version: It’s Actually Easy) If you can stir, you can make these. Here’s the breakdown: First, mix your dry stuff—almond flour, baking powder, and whatever sweetener you’re using. Next, drop in the cold butter and squish it in with your fingers (messy, but also kinda fun, I won’t lie). Once it looks like crumbs, add the eggs and any extras. Stir it up until just blended. Now, don’t overthink it. Scoop your dough onto a parchment-lined tray. Shape it quickly—don’t fuss. Slice into wedges (or make little mounds if you’re lazy, I won’t tell). Bake around 20 minutes at 350°F until they’re just golden. Once they’re out, resist the urge to eat one right away. Let them cool. (Trust me, they hold together better if you wait.) Serving Suggestions So, almond flour scones are basically a blank canvas for whatever you’re in the mood for: Slather with jam or nut butter for a classic vibe. Pair with coffee, tea, or even a glass of icy almond milk. Go wild with a drizzle of honey and a pat of butter for five-star restaurant feels. If you’re feeling brave, split them open and fill with berries and whipped cream. Real talk: breakfast, snack, or dessert—these fit anywhere. Common Questions Why almond flour instead of regular flour? I like the flavor and the softer texture, plus it’s gluten-free and just a bit healthier (for my conscience at least). Do almond flour scones taste sweet? They’re lightly sweet, but not dessert-sweet. You control the sugar, so tweak for your taste buds. Can I freeze almond flour scones? Absolutely! Toss ’em in a zip bag. Toast straight from the freezer later. Lazy day win. What if mine are too crumbly? Try another egg or add a spoonful of yogurt next time. Almond flour’s different than wheat flour, so sometimes you gotta play around. Is it easy to swap add-ins? Oh, you bet. Chocolate, fruit, nuts—throw in whatever you love. Just avoid lots of wet add-ins so things don’t get soggy. Ready to Try Almond Flour Scones? Okay, so you don’t have to be a baking superstar to knock out almond flour scones, and nobody’s going to believe you whipped them up last minute. No mixer, barely any mess. If you want to master the almond flour scone life, this quick video walks you through it, or peek at the almond flour scone FAQ for more pointers. Next time you’re stumped for what to serve with afternoon tea or, you know, just feeling snacky, give these a shot. Don’t wait for a special occasion, just go for it. If you do, I promise you’ll be passing this little trick along to every friend who drops by unexpectedly. These Almond Flour Scones are delightfully soft, tender, and naturally gluten-free….