Best Ever Air Fryer Beef Jerky Recipe: 5-Step Guide to the Perfect Snack!
Making your own air fryer beef jerky recipe is one of the most satisfying and nutritious ways to enjoy a high-protein snack. Whether you’re a fitness enthusiast, a road tripper, or someone who just loves bold flavors, this recipe has you covered. And guess what? You don’t need a dehydrator—your air fryer can do it all.
Air Fryer Beef Jerky recipe (Table of Contents)
What is Beef Jerky?
Beef jerky is a savory, protein-packed snack made by drying thin slices of seasoned meat. The low moisture content gives it a chewy texture and a long shelf life. Popular across cultures, it originated as a preservation method but is now a snack-time staple.
Why Make Jerky in an Air Fryer?
Using an air fryer to make beef jerky cuts down on the traditional drying time. It’s faster, energy-efficient, and doesn’t require fancy dehydrators. The circulating hot air creates the perfect conditions for drying, crisping, and locking in flavor without overcooking.
Lean cuts work best for jerky. Fat doesn’t dehydrate well and can cause spoilage. Look for these options:
- Eye of round (lean and affordable)
- Top round or bottom round (great texture)
- Sirloin tip (a bit pricier but tender)
- Flank steak (rich flavor)
Always trim off any visible fat before slicing.
Best Marinade for Air Fryer Beef Jerky
The marinade makes the magic happen. For a classic, bold jerky flavor:
- Soy sauce – brings salt and umami
- Worcestershire sauce – adds depth
- Liquid smoke – gives that campfire flavor
- Garlic powder, onion powder, black pepper – essential spices
- Brown sugar or honey – balances the salt with sweetness
You can tweak this for spicy, sweet, or teriyaki flavors.

Essential Ingredients List
- 1–2 lbs lean beef (eye of round, top round, etc.)
- ½ cup soy sauce
- 2 tbsp Worcestershire sauce
- 1 tsp black pepper
- 1 tsp garlic powder
- 1 tsp onion powder
- ½ tsp red pepper flakes (optional)
- 1 tbsp brown sugar (optional)
- ½ tsp liquid smoke (optional)
(Continued in next response…)
Air Fryer Beef Jerky Recipe (continued)
Equipment Needed for This Recipe
You don’t need a lot of fancy tools to make jerky at home. Here’s what you’ll need:
- Sharp knife or meat slicer
- Mixing bowls for marinade
- Ziplock bags or airtight container for marinating
- Paper towels
- Air fryer (with a dehydrating function, if possible)
- Kitchen tongs
If your air fryer has a wire rack or multi-layer trays, even better—you can dehydrate more meat in one batch.
Preparing the Meat for Marination
Start with partially frozen meat—it’s much easier to slice thinly. Slice your beef into even 1/8 to 1/4 inch thick strips, going against the grain for a more tender chew, or with the grain for a classic jerky bite.
Blot the slices dry with paper towels to remove excess moisture before marinating.
How Long to Marinate Beef Jerky
Time is flavor! Marinate your beef in the refrigerator for at least 6 hours, but ideally overnight (up to 24 hours) for maximum flavor penetration. Make sure every strip is submerged or well-coated in the marinade.
Cutting the Meat: Tips and Tricks
Uniform slices are crucial for even cooking. Use a ruler or guide if needed. If you prefer a chewy, toothsome jerky, slice the meat with the grain. For a softer texture, slice against the grain.
Should You Freeze Meat Before Slicing?
Yes, freezing the beef for 30–45 minutes before slicing makes it firmer and easier to cut thin, uniform strips. This helps with both texture and even dehydration in the air fryer.
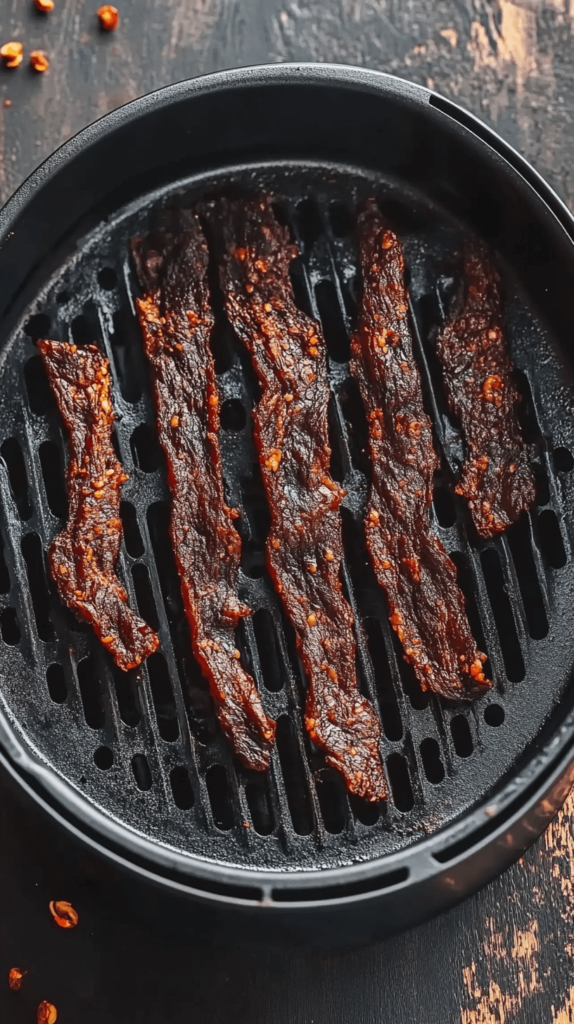
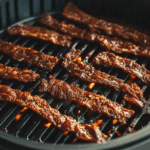
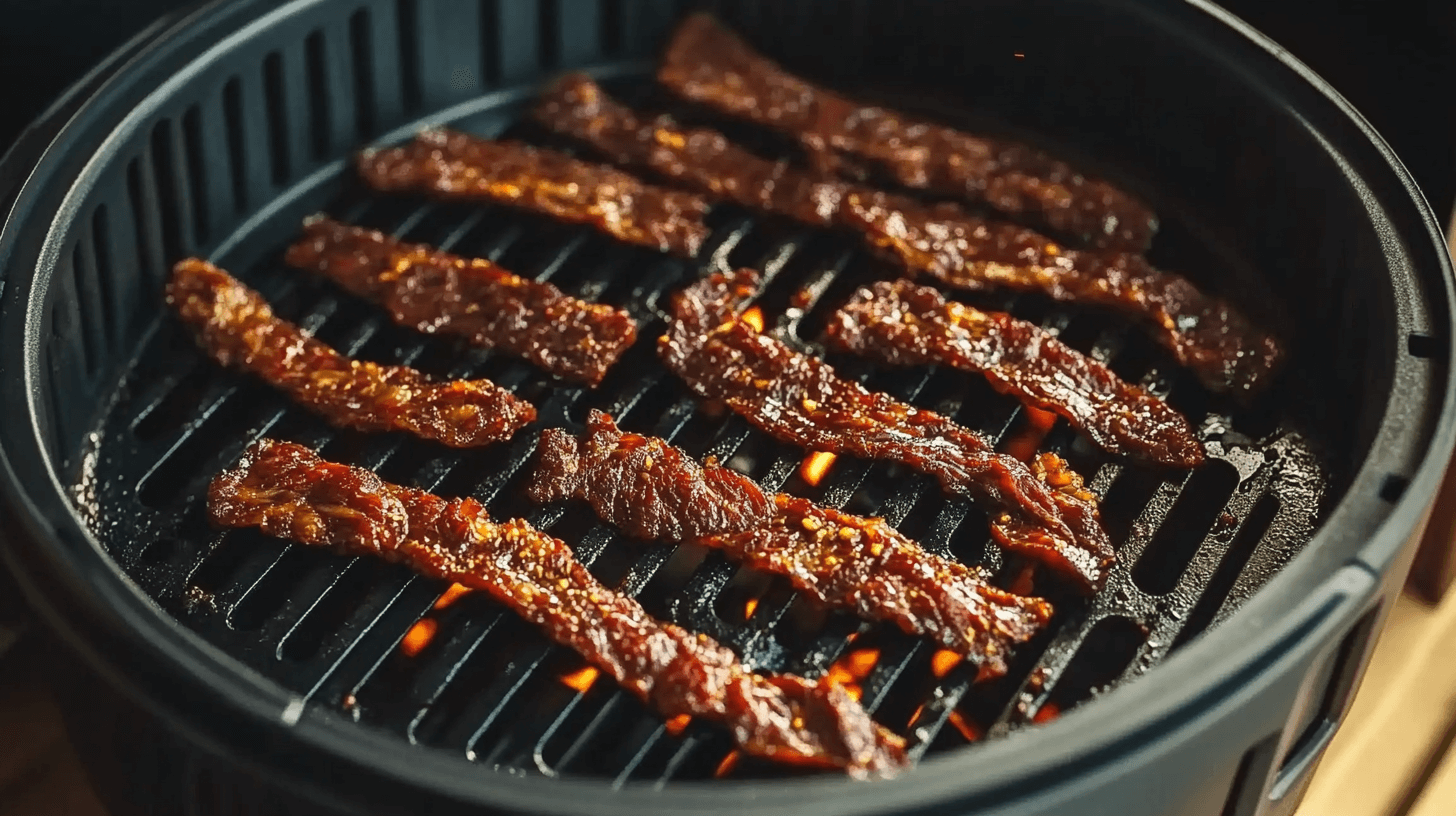
Setting Up Your Air Fryer for Jerky
Preheat your air fryer to 160°F (71°C) if it allows for precise temperature control. Line the bottom with foil or parchment to catch drips, and arrange the meat strips in a single layer on trays or racks—do not overlap!
Ideal Temperature for Dehydrating Jerky
The USDA recommends dehydrating jerky at 160°F to safely kill any bacteria. Most air fryers reach this temp easily, and it’s low enough to dry the meat without cooking it.
Air Fryer Settings for Optimal Texture
- Temperature: 160°F (or as low as your fryer goes)
- Time: 2–4 hours depending on thickness and your air fryer model
- Flip or rotate: Every hour for even drying
Keep the air flowing! If your air fryer has a fan or “dehydrate” setting, use it.
How Long to Cook Beef Jerky in Air Fryer
Typically, thin slices take 2–3 hours, while thicker slices may need up to 4 hours. Start checking at the 2-hour mark. The jerky should be firm, dry, and bendable—not brittle.
Signs Your Jerky is Done
Done jerky will:
- Bend and crack slightly without breaking
- Feel dry to the touch, but not hard
- No longer be moist in the center
- Darken in color uniformly
Let it cool—jerky firms up more as it rests.
Air Fryer Beef Jerky recipe
Storing Homemade Beef Jerky
Let your jerky cool completely. Store it in an airtight container or vacuum-sealed bag. For longer shelf life:
- Room temperature: Up to 1 week
- Fridge: Up to 3 weeks
- Freezer: Up to 6 months
Always label with the date you made it.
Air Fryer Beef Jerky recipe
Shelf Life of Air Fryer Jerky
Homemade jerky lasts 1–2 weeks unrefrigerated, or 3+ weeks if refrigerated. Store in a cool, dark place to extend freshness. Use desiccant packs in storage jars for extra preservation.
(Continued in next response…)
Air Fryer Beef Jerky Recipe (continued)

How to Make Beef Jerky Spicier
If you love heat, spice it up with:
- Cayenne pepper
- Sriracha
- Chili garlic sauce
- Crushed red pepper
- Jalapeño-infused soy sauce
Let spicy versions marinate longer for a deeper burn. Pair with a touch of honey to balance the heat.
Air Fryer Beef Jerky recipe
Sweet and Savory Jerky Variations
Experiment with your marinade! Try adding:
- Pineapple juice or orange juice (tropical twist)
- Maple syrup and cracked pepper (sweet & bold)
- Teriyaki sauce and sesame seeds (Asian-inspired)
- Apple cider vinegar and smoked paprika (tangy & smoky)
Customize flavors to suit your snack cravings or dietary needs.
Air Fryer Beef Jerky recipe
Keto-Friendly Beef Jerky Tips
For low-carb jerky:
- Skip sugar and use keto-friendly sweeteners like erythritol
- Watch out for soy sauce—opt for coconut aminos
- Use lean cuts to minimize hidden carbs
This version is perfect for keto diets, intermittent fasting, and high-protein goals.
Air Fryer Beef Jerky recipe
Low-Sodium Alternatives for Jerky
To make your jerky lower in sodium:
- Use low-sodium soy sauce or coconut aminos
- Skip Worcestershire sauce or find a low-sodium variety
- Avoid adding extra salt
- Rinse the beef lightly after marinating (optional but effective)
You’ll still get big flavor without going overboard on salt.
Air Fryer Beef Jerky recipe
Kid-Friendly Beef Jerky Flavors
Make jerky more appealing to little taste buds by:
- Reducing spice and skipping liquid smoke
- Using BBQ sauce or honey mustard marinades
- Cutting into fun shapes or bite-sized pieces
It’s a healthier alternative to sugary snacks and perfect for lunchboxes.
Common Mistakes to Avoid
- Slicing meat too thick – leads to under-drying
- Overlapping strips in the fryer – uneven cooking
- Skipping the marinade – flavorless results
- Not patting meat dry before air frying – excess moisture delays dehydration
- Using fatty cuts – can spoil faster
Stay sharp, follow the process, and you’ll get amazing jerky every time.
Air Fryer Beef Jerky recipe
Air Fryer vs Dehydrator: Which is Better?
Air fryers are:
- Faster
- Easier to clean
- More versatile
Dehydrators are:
- Great for large batches
- Precise in temperature
- Energy-efficient for long runs
For small home batches, air fryers are a convenient choice!
Air Fryer Beef Jerky recipe
Can You Make Chicken or Turkey Jerky Too?
Absolutely—but you MUST cook poultry to a safe internal temp of 165°F (74°C). Use lean cuts like turkey breast or chicken tenderloin, and follow similar marinade/drying techniques.
Safety Tips for Making Jerky at Home
- Use fresh, high-quality meat
- Marinate in the fridge, not at room temp
- Preheat your air fryer
- Dry at or above 160°F for safety
- Store properly in airtight containers
These steps prevent bacteria growth and ensure delicious, safe jerky.
Air Fryer Beef Jerky recipe
How to Vacuum Seal Jerky for Storage
Use a vacuum sealer to:
- Extend jerky’s shelf life
- Keep out moisture and air
- Maintain freshness and texture
Perfect for meal preppers, hikers, or homemade gift baskets.
Creative Ways to Use Leftover Jerky
Leftover jerky? No problem! Try it in:
- Trail mix with nuts and dried fruit
- Omelets or scrambled eggs
- Topping for salads or soups
- Chopped into fried rice or noodles
- Sandwiches or wraps
Jerky’s intense flavor adds a savory kick to tons of dishes.
Air Fryer Beef Jerky recipe
FAQ: Troubleshooting Your Recipe
Why is my beef jerky too tough?
You may have sliced too thick or overcooked it. Try slicing thinner or adjusting time.
Why does my jerky taste bland?
Not marinating long enough or under-seasoning could be the cause. Amp up your spices and soak longer.
Can I refry jerky to make it crispier?
Yes! A few extra minutes in the air fryer (watch closely) can add crunch.
How do I keep jerky from going bad?
Store it in airtight containers, refrigerate, or vacuum seal for longevity.
Do I need to flip the jerky in the air fryer?
Yes, every hour for even drying and to prevent sticking.
Can I make beef jerky with frozen meat?
Only partially thawed meat should be used for easy slicing—not fully frozen or cooked.
Final Thoughts on Making Air Fryer Jerky
Making your own air fryer beef jerky recipe is easier, healthier, and tastier than store-bought options. With just a few ingredients, a bit of prep, and your trusty air fryer, you can whip up savory snacks perfect for road trips, hiking, or guilt-free nibbling.
PrintAir Fryer Beef Jerky
A satisfying and nutritious high-protein snack made effortlessly using an air fryer.
- Prep Time: 20 minutes
- Cook Time: 180 minutes
- Total Time: 200 minutes
- Yield: 4 servings 1x
- Category: Snack
- Method: Air Frying
- Cuisine: American
- Diet: Paleo, Keto
Ingredients
- 1–2 lbs lean beef (eye of round, top round, etc.)
- ½ cup soy sauce
- 2 tbsp Worcestershire sauce
- 1 tsp black pepper
- 1 tsp garlic powder
- 1 tsp onion powder
- ½ tsp red pepper flakes (optional)
- 1 tbsp brown sugar (optional)
- ½ tsp liquid smoke (optional)
Instructions
- Slice the partially frozen beef into even 1/8 to 1/4 inch thick strips against the grain.
- Blot the slices dry with paper towels.
- Mix all marinade ingredients in a bowl.
- Marinate the beef strips in the refrigerator for at least 6 hours, preferably overnight.
- Preheat your air fryer to 160°F (71°C).
- Arrange the meat strips in a single layer on trays or racks in the air fryer.
- Cook for 2–4 hours, flipping or rotating every hour, until jerky is firm and dry but not brittle.
- Let the jerky cool to firm up further before storing.
Notes
For extra flavor, you can tweak the marinade with spices or sweeteners to suit your taste. Store the jerky properly to extend shelf life.
Nutrition
- Serving Size: 1 serving
- Calories: 100
- Sugar: 2g
- Sodium: 580mg
- Fat: 5g
- Saturated Fat: 2g
- Unsaturated Fat: 2g
- Trans Fat: 0g
- Carbohydrates: 5g
- Fiber: 1g
- Protein: 15g
- Cholesterol: 40mg
Air Fryer Beef Jerky
Ingredients
Method
- Slice the partially frozen beef into even 1/8 to 1/4 inch thick strips against the grain.
- Blot the slices dry with paper towels.
- Mix all marinade ingredients in a bowl.
- Marinate the beef strips in the refrigerator for at least 6 hours, preferably overnight.
- Preheat your air fryer to 160°F (71°C).
- Arrange the meat strips in a single layer on trays or racks in the air fryer.
- Cook for 2–4 hours, flipping or rotating every hour, until jerky is firm and dry but not brittle.
- Let the jerky cool to firm up further before storing.