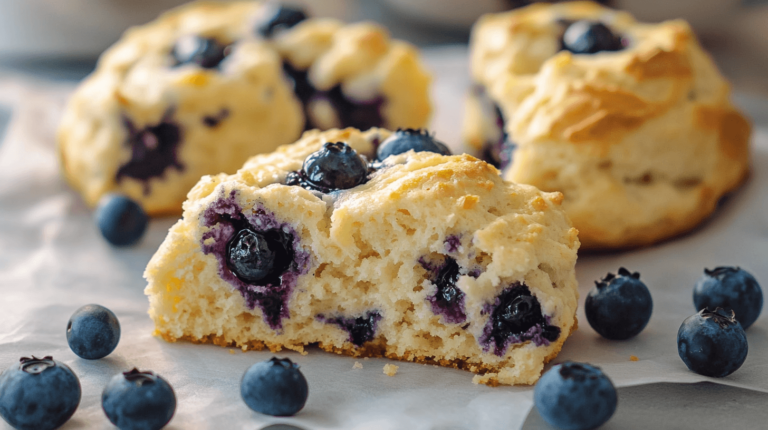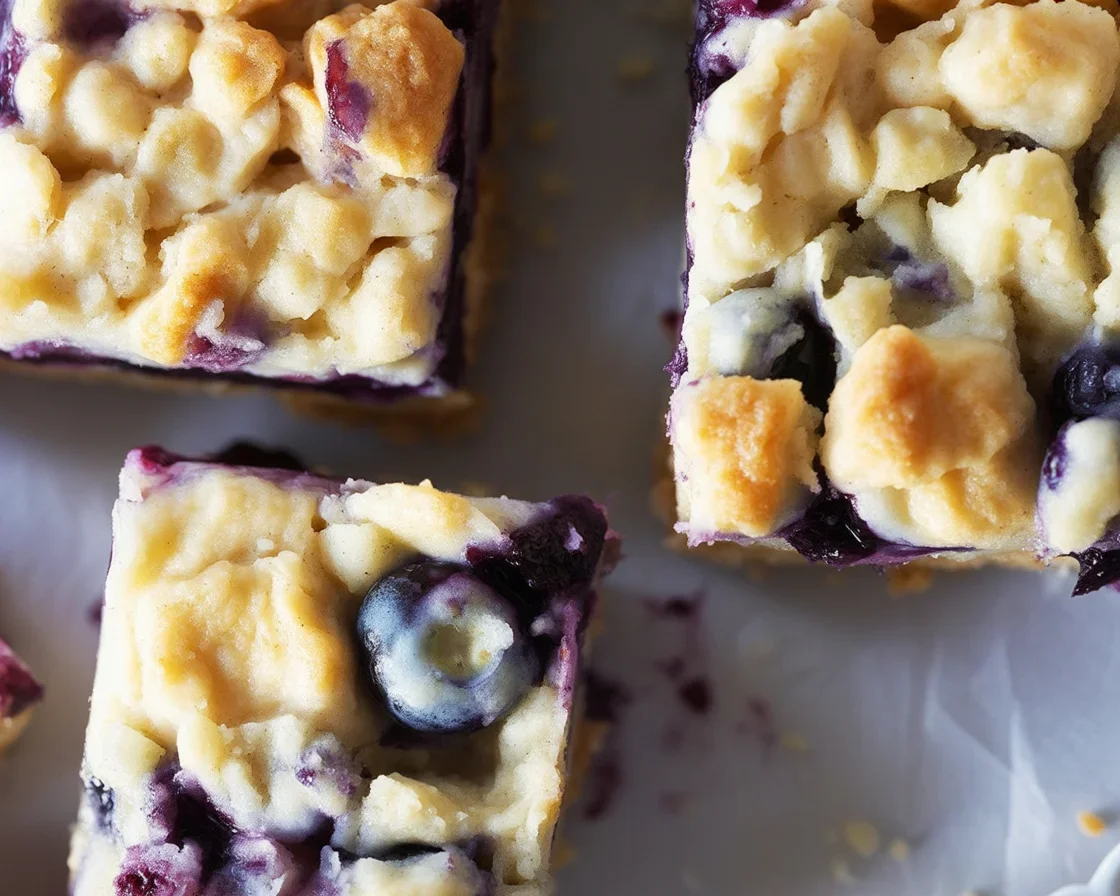
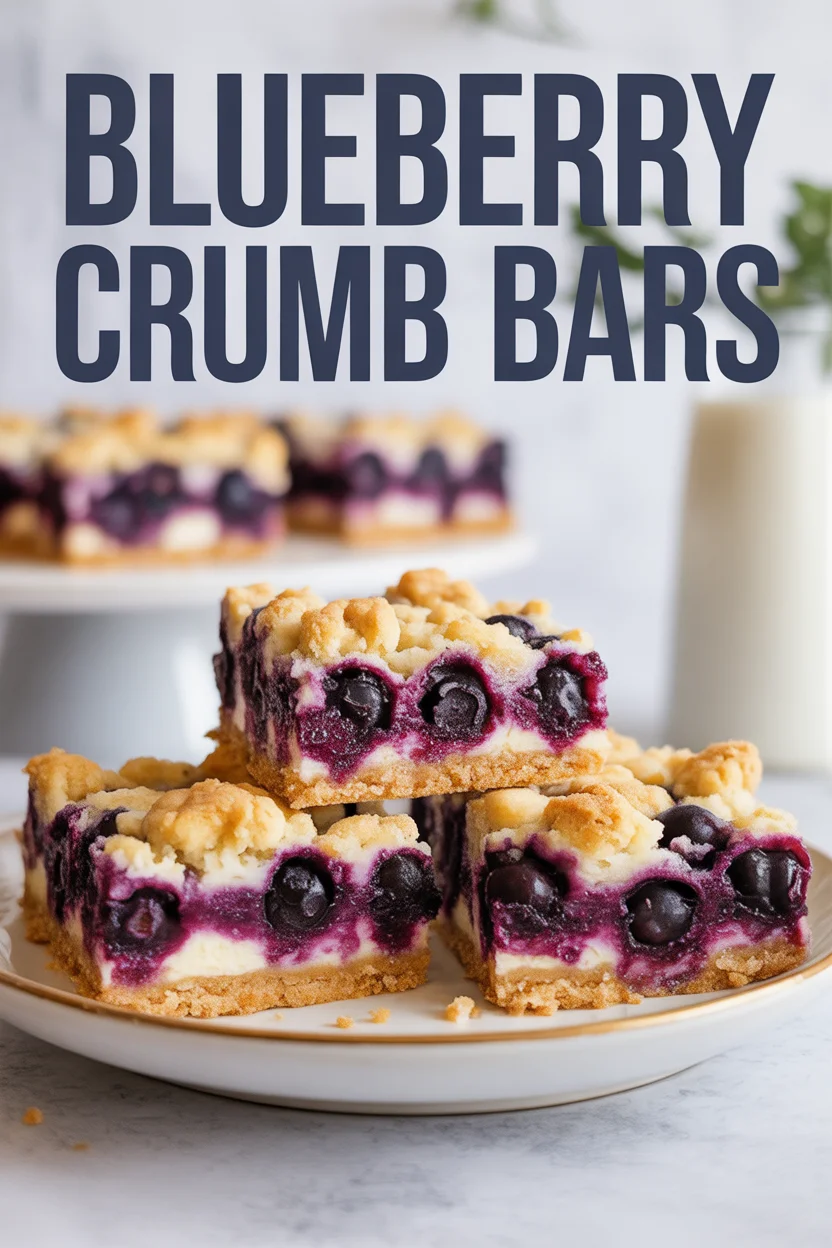
Blueberry Crumb Bars
Blueberry Crumb Bars have totally saved my skin during unexpected snack attacks or, you know, when random guests drop by (why do they always arrive when your kitchen is a disaster?).
There’s nothing like the smell of buttery crumbs and tangy-sweet blueberries filling up the house. No one can say no. Sometimes I whip these up when I’ve got too many berries hanging out in the fridge, and let’s be honest, it’s always better than letting them shrivel up.
If you’re the kind of person who loves lazy Sunday bakes or just wants that five-minute hero moment at breakfast, this is your jam. Oh, and if you want more fruity ideas, definitely check out this banana blueberry baked oatmeal recipe, it’s another crowd-pleaser for those of us who like easy kitchen wins.

Blueberry Crumb Bars
Let me level with you. These are straight-up simple. You don’t need any fancy gadgets or culinary school tricks. Heck, you probably have everything in your pantry except maybe the blueberries (frozen works just fine, I won’t tell). My favorite part? The crumbly topping that flirts shamelessly with the gooey berry filling. First time I made these, I legit sat on the counter eating warm corners with a fork, pretending to “taste test.” These bars aren’t delicate—they’re rustic, packed, and so easy, a kid could probably tackle ‘em on a rainy afternoon.
Big tip though: let them cool before you cut. Otherwise, they’re a hot mess (still edible, but wow, not cute). And if you want even more blueberry goodness, you gotta try a healthy blueberry crisp for dessert. I’ve got a friend (Hi Kelly!) who says these bars taste like summer vacation, which is exactly how I wanna feel all year long.
“Honestly, I make these Blueberry Crumb Bars at least twice a month for my book club. People act like I’ve staged a mini bakery in my kitchen, but the secret is—shhh—they’re the easiest thing ever.”
– Megan L.
Ingredients You’ll Need
Here’s what you want on your counter before you even think about mixing. Trust me, doing this first stops you from tripping over bags of sugar looking for that last lemon.
- 1 cup unsalted butter (cold is best, not melty!)
- 2 cups regular flour
- ¾ cup sugar (white, simple as can be)
- ¼ tsp salt
- ½ tsp baking powder
- Zest from 1 lemon (totally optional, but I say yes)
- 2 cups fresh or frozen blueberries (don’t thaw if frozen)
- ¼ cup extra sugar for the berries (or just a big healthy pinch)
- 2 tsp cornstarch (for a nice thick filling)
Directions
Keep it chill, don’t panic. Here’s the vibe:
- Preheat the oven to 375°F. Grease a regular square (8×8 inch) pan.
- Dump flour, sugar, salt, baking powder in a bowl. Mix quick.
- Cut in cold butter (use your fingers if you like messy hands). Stop when crumbles.
- Divide the dough almost in half. Press bigger half into the pan, squish it flat.
- Mix blueberries, extra sugar, cornstarch, and lemon zest. Spread this in the pan over the bottom layer.
- Sprinkle the rest of your crumb dough all over the top. No need for perfection.
- Bake for maybe 40–45 minutes, until top’s just golden and you start to drool.
- Cool for—ugh, the hard bit—an hour. Cut into squares.
Tips for the Best Blueberry Crumb Bars
Here’s the real stuff. Like, things you won’t find on the side of a flour bag.
First, cold butter is not just a suggestion. It makes the bars extra crumbly and perfect. If you want the slices to look magazine-worthy, chill the bars for a bit before you cut. I burn my tongue every time because I cannot wait, but learn from my mistakes, please. Oh, and use good berries. If they’re super sour, add a smidge more sugar. One summer I even tossed in raspberries for fun, big gamble, but so so satisfying.
Another thing I do—don’t tell my grandma—I sometimes sprinkle a little cinnamon in the crumb for a warm kick. Feels like a cozy hug. Please write and tell me if you experiment, I love hearing new twists!
Serving Suggestions
So you pulled ‘em out of the pan. Now what? Try these:
- For breakfast, pop a bar next to your coffee for a treat that feels lowkey fancy.
- Wrap a couple for road trips, lunchboxes, or sneaky movie snacks.
- Warm up leftovers, then dollop with a scoop of vanilla ice cream—oh man, over the top.
- Take to a picnic and accept all the praise. Soak it up!
So, next time you spot blueberries begging to be used up, you know what to do. Blueberry Crumb Bars never disappoint and honestly, some days these taste better than a five-star bakery’s best. If you’re hooked on blueberries (and how could you not be?), try swinging by the healthy blueberry crisp post for another take. Let me know if you give these a go, I love sharing the mess and the joy!
Blueberry Crumb Bars

Simple and delicious blueberry crumb bars perfect for unexpected snack attacks or breakfast treats.
- Prep Time: 15 minutes
- Cook Time: 45 minutes
- Total Time: 60 minutes
- Yield: 16 servings 1x
- Category: Dessert
- Method: Baking
- Cuisine: American
- Diet: Vegetarian
Ingredients
- 1 cup unsalted butter (cold)
- 2 cups all-purpose flour
- ¾ cup granulated sugar
- ¼ tsp salt
- ½ tsp baking powder
- Zest from 1 lemon (optional)
- 2 cups fresh or frozen blueberries (do not thaw)
- ¼ cup granulated sugar for the berries
- 2 tsp cornstarch
Instructions
- Preheat the oven to 375°F. Grease an 8×8 inch square pan.
- In a bowl, mix flour, sugar, salt, and baking powder.
- Cut in cold butter until the mixture resembles crumbles.
- Divide the dough almost in half and press the larger half into the bottom of the pan.
- In a separate bowl, mix blueberries, extra sugar, cornstarch, and lemon zest. Spread this mixture over the bottom layer.
- Sprinkle the remaining crumb dough over the top.
- Bake for 40-45 minutes, until the top is golden.
- Let the bars cool for an hour before cutting them into squares.
Notes
Using cold butter makes the bars extra crumbly. For magazine-worthy slices, chill before cutting. Add a bit of cinnamon for a warm flavor twist.
Nutrition
- Serving Size: 1 square
- Calories: 250
- Sugar: 14g
- Sodium: 100mg
- Fat: 12g
- Saturated Fat: 7g
- Unsaturated Fat: 4g
- Trans Fat: 0g
- Carbohydrates: 36g
- Fiber: 1g
- Protein: 2g
- Cholesterol: 30mg
Blueberry Crumb Bars
Ingredients
Method
- Preheat the oven to 375°F. Grease an 8×8 inch square pan.
- In a bowl, mix flour, sugar, salt, and baking powder.
- Cut in cold butter until the mixture resembles crumbles.
- Divide the dough almost in half and press the larger half into the bottom of the pan.
- In a separate bowl, mix blueberries, extra sugar, cornstarch, and lemon zest. Spread this mixture over the bottom layer.
- Sprinkle the remaining crumb dough over the top.
- Bake for 40-45 minutes, until the top is golden.
- Let the bars cool for an hour before cutting them into squares.