Air Fryer Chicken Fajitas

Air Fryer Chicken Fajitas

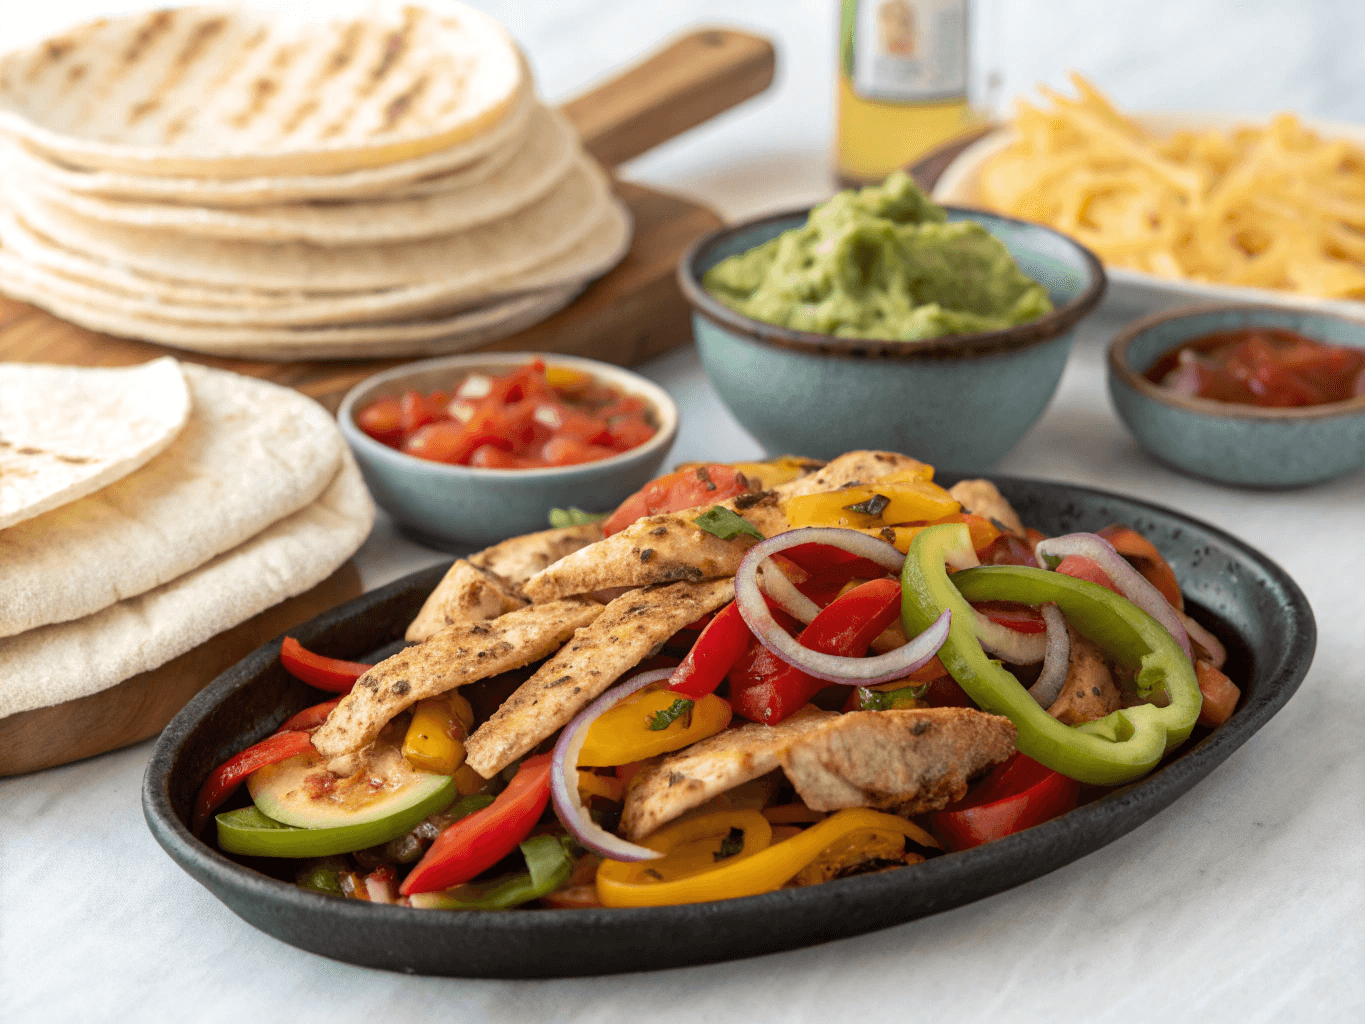
Making chicken fajitas in an air fryer is an easy way to enjoy this Tex-Mex favorite at home. Juicy chicken strips, colorful bell peppers, and onions are flavored and cooked just right in the air fryer. In just 20 minutes, you’ll have delicious fajitas ready to pair with warm tortillas and your choice of toppings.

Air Fryer Chicken Fajitas

Why You’ll Love This Recipe

  • Quick & Healthy – Prepared in under 25 minutes.

  • One-Basket Meal – Chicken and veggies cooked at once.

  • Versatile – Customize with sour cream, guacamole, or your favorite salsa.

  • Family Favorite – Perfect for hectic weeknight meals.


Ingredients “Air Fryer Chicken Fajitas”

  • 1 lb chicken breast, cut into thin strips

  • 2 bell peppers (red, yellow, or green), sliced

  • 1 medium onion, sliced

  • 2 tbsp olive oil

  • 1 tsp chili powder

  • 1 tsp smoked paprika

  • ½ tsp cumin

  • ½ tsp garlic powder

  • ½ tsp onion powder

  • ½ tsp salt

  • ¼ tsp black pepper

  • Tortillas + toppings of choice

Instructions

  1. Preheat the air fryer to 375°F (190°C).

  2. In a large bowl, mix the chicken, peppers, and onion with olive oil and spices.

  3. Place the mixture in the air fryer basket in a single layer.

  4. Cook for 15 minutes, shaking the basket halfway through.

  5. Serve hot in warmed tortillas, alongside guacamole, salsa, or cheese.

Air Fryer Chicken Fajitas

Storage & Tips

  • Store leftovers in the fridge for up to 3 days.

  • Reheat in the air fryer for 3-4 minutes.

  • For a low-carb alternative, serve over lettuce or cauliflower rice

Air Fryer Chicken Fajitas

Print

Air Fryer Chicken Fajitas

Enjoy juicy chicken strips, colorful bell peppers, and onions cooked to perfection in the air fryer for a quick Tex-Mex meal.

  • Author: helth-recipe
  • Prep Time: 10 minutes
  • Cook Time: 15 minutes
  • Total Time: 25 minutes
  • Yield: 4 servings 1x
  • Category: Main Course
  • Method: Air Frying
  • Cuisine: Mexican
  • Diet: Paleo

Ingredients

Scale
  • 1 lb chicken breast, cut into thin strips
  • 2 bell peppers (red, yellow, or green), sliced
  • 1 medium onion, sliced
  • 2 tbsp olive oil
  • 1 tsp chili powder
  • 1 tsp smoked paprika
  • ½ tsp cumin
  • ½ tsp garlic powder
  • ½ tsp onion powder
  • ½ tsp salt
  • ¼ tsp black pepper
  • Tortillas + toppings of choice

Instructions

  1. Preheat the air fryer to 375°F (190°C).
  2. In a large bowl, mix the chicken, peppers, and onion with olive oil and spices.
  3. Place the mixture in the air fryer basket in a single layer.
  4. Cook for 15 minutes, shaking the basket halfway through.
  5. Serve hot in warmed tortillas, alongside guacamole, salsa, or cheese.

Notes

Store leftovers in the fridge for up to 3 days. Reheat in the air fryer for 3-4 minutes. For a low-carb alternative, serve over lettuce or cauliflower rice.

Nutrition

  • Serving Size: 1 serving
  • Calories: 400
  • Sugar: 5g
  • Sodium: 600mg
  • Fat: 18g
  • Saturated Fat: 3g
  • Unsaturated Fat: 10g
  • Trans Fat: 0g
  • Carbohydrates: 30g
  • Fiber: 4g
  • Protein: 32g
  • Cholesterol: 80mg

Did you make this recipe?

Share a photo and tag us — we can't wait to see what you've made!


Air Fryer Chicken Fajitas

Air Fryer Chicken Fajitas

Enjoy juicy chicken strips, colorful bell peppers, and onions cooked to perfection in the air fryer for a quick Tex-Mex meal.
Prep Time 10 minutes
Cook Time 15 minutes
Total Time 25 minutes
Servings: 4 servings
Course: Main Course
Cuisine: Mexican
Calories: 400

Ingredients
  

Main Ingredients
  • 1 lb chicken breast, cut into thin strips Juicy and tender for the best fajitas.
  • 2 pieces bell peppers (red, yellow, or green), sliced Adds color and sweetness.
  • 1 medium onion, sliced For added flavor.
  • 2 tbsp olive oil To coat the ingredients.
Spices
  • 1 tsp chili powder For a mild spice.
  • 1 tsp smoked paprika Adds a smoky flavor.
  • ½ tsp cumin Warm flavor.
  • ½ tsp garlic powder For savory richness.
  • ½ tsp onion powder Enhances the onion flavor.
  • ½ tsp salt To taste.
  • ¼ tsp black pepper For additional seasoning.
Serving
  • Tortillas Tortillas + toppings of choice Choose your favorite toppings like guacamole, salsa, or cheese.

Method
 

Preparation
  1. Preheat the air fryer to 375°F (190°C).
  2. In a large bowl, mix the chicken, peppers, and onion with olive oil and spices.
Cooking
  1. Place the mixture in the air fryer basket in a single layer.
  2. Cook for 15 minutes, shaking the basket halfway through.
Serving
  1. Serve hot in warmed tortillas, alongside guacamole, salsa, or cheese.

Notes

Store leftovers in the fridge for up to 3 days. Reheat in the air fryer for 3-4 minutes. For a low-carb alternative, serve over lettuce or cauliflower rice.

Similar Posts

  • Deliciously Crispy Air Fryer Buffalo Chicken Egg Rolls: The Ultimate Snack in 30 Minutes

    Air Fryer Buffalo Chicken Egg Rolls are a delightful combination of spicy buffalo chicken, creamy cheese, and crispy egg roll wrappers. Perfect for parties, game nights, or even a quick snack, these egg rolls offer a bold flavor with minimal effort. The air fryer method ensures they’re golden brown, crunchy, and cooked to perfection without…

  • Classic Stuffed Cabbage Rolls Recipe – 5 Easy Steps for a Comfort Food Delight

    Stuffed cabbage rolls are a timeless comfort food cherished across many cultures. These tender cabbage leaves, filled with a savory meat and rice mixture, simmered in a rich tomato sauce, create the perfect balance of flavors. Whether you’re preparing them for a holiday meal or a cozy family dinner, this Classic Stuffed Cabbage Rolls recipe…

  • COZY AUTUMN WILD RICE SOUP: 7 Delicious Secrets for the Ultimate Fall Comfort

    Is there anything better than walking in from a crisp autumn day to the inviting aroma of something simmering on the stove? That feeling, that moment of pure warmth and comfort, is exactly what a bowl of COZY AUTUMN WILD RICE SOUP delivers. It’s more than just a meal; it’s an experience, a liquid hug…

  • Oven Roasted Carrots with Cinnamon: 7 Delicious Secrets for the Ultimate Side Dish

    Oven Roasted Carrots with Cinnamon brings a warmth to the kitchen that reminds me of my grandmother’s small village home, where the scent of spices always danced in the air. When I started my culinary journey at HelthRecipe, I wanted to prove that you don’t need a Michelin-star budget to create magic; sometimes, you just…

  • healthy Chocolate Chip Cottage Cheese Cookie Dough Bites

        Why You’ll Love This Recipe How to Make Tips for Making This Edible Cookie Dough How to Store Cookie Dough Substitutions & Notes Serving Suggestions Common Questions You Seriously Need to Try This Ever bite into something that looks all decadent and, you know, sinfully good, only to discover it’s actually healthy? Okay, I know, you’re skeptical. But stick with me. Healthy Chocolate Chip Cottage Cheese Cookie Dough Bites! These are my secret for satisfying sweet cravings on a random Tuesday night when I don’t wanna deal with the oven or a ton of cleanup. You get the creamy richness of cookie dough with better-for-you ingredients. And yeah, it actually works. Like, even my totally skeptical cousin asked for the recipe last weekend. Why You’ll Love This Recipe Alright, here’s the lowdown. First, these little bites are just so easy. No need to crank up the oven or wait hours—mix, chill, eat. Yes, for real. You’ll sneak in some protein (thanks, cottage cheese) and skip all that raw egg drama. If you’re worried about “cottage cheese taste,” don’t—it basically vanishes under the chocolate and vanilla. I make a stash on busy weeks since, honestly, they crush those midday snack cravings. Kids? They’ll never notice the healthy swap. Oh! And if you want a bite with your coffee, these don’t disappoint. They’re like your favorite chocolate chip cookie, but with that “Mom, did you go to a nutritionist?” kind of vibe. To top it off, no one ever believes you made them. I literally had a friend declare me “a five-star restaurant chef” (okay, that’s pushing it, but I’ll take the compliment). “I was super skeptical about using cottage cheese, but these bites are unreal! Can’t get enough. My kids demolished the whole batch in two days—no joke.” – Amanda, real-life cookie fiend   How to Make So let’s get into it. Honestly, just grab a food processor or a sturdy blender (if not, lots of elbow grease and a fork will do). Toss in your cottage cheese, a glob of nut butter (peanut, almond, whatever makes your heart happy), a splash of vanilla, and a bit of maple syrup. Blitz it till it’s totally smooth. Now, tip it into a bowl and fold in some almond flour (this gives the dough that real cookie texture) and a sprinkle of mini chocolate chips. If the dough feels a little sticky, add a touch more almond flour. Roll the mix into small balls—honestly, just scoop and pinch because there’s no exact science here. Pop ‘em in the fridge for half an hour so they’re firm. And that’s it! No turning on the oven, just pure instant gratification. Ingredient Amount Notes Cottage cheese 1 cup Full-fat for creaminess Nut butter 2 Tbsp Peanut or almond, both work Maple syrup 2 Tbsp Honey if you prefer Vanilla extract 1 tsp Real deal always best Almond flour ½ cup (plus more as needed) Add to reach desired doughiness Mini chocolate chips ¼ cup Dark or regular Tips for Making This Edible Cookie Dough Let me spill my secrets. First: always blend the cottage cheese really, really well. Like, no lumps—otherwise, your bites might be a little, well, funky textured. Next, use mini chocolate chips if you can. There’s just something magical about tinier chips that make every bite chocolatey and even. If you want a softer dough (hey, I get it), go a little lighter on almond flour. Too dry? Add just a hint more nut butter, but not too much. I’ve gone through that gooey mess. You don’t want to be eating it with a spoon. Chill the dough for at least thirty minutes before forming balls. Warm dough sticks everywhere. Trust me, I’ve been there, and it’s annoying.   How to Store Cookie Dough Storage is, honestly, the easiest part. Throw your bites in a tightly sealed container. I like to use those weird mismatched Tupperware lids everyone somehow collects (if you know, you know). Pop them in the fridge and they’ll last all week. Sometimes longer. But let’s be real—they’ll be gone before day four if you have snacky people around. If you’re prepping way ahead? Throw them in the freezer. Just thaw a bit before you wanna snack, or risk a chipped tooth, ha. Substitutions & Notes Alright, here’s where you get to play. Not a fan of almond flour? Oat flour works in a pinch, just has a slightly heartier taste. No maple syrup at home? Honey is totally fine, or agave for my vegan pals. Dairy-free? Easy. There are vegan cottage cheese brands now (ask me how shocked I was the first time I spotted a tub). Or swap out the nut butter for sunbutter if you need nut-free. Just don’t skip the vanilla—seriously, it does everything to make this dough taste like a cookie miracle. One batch, endless ways. Serving Suggestions…