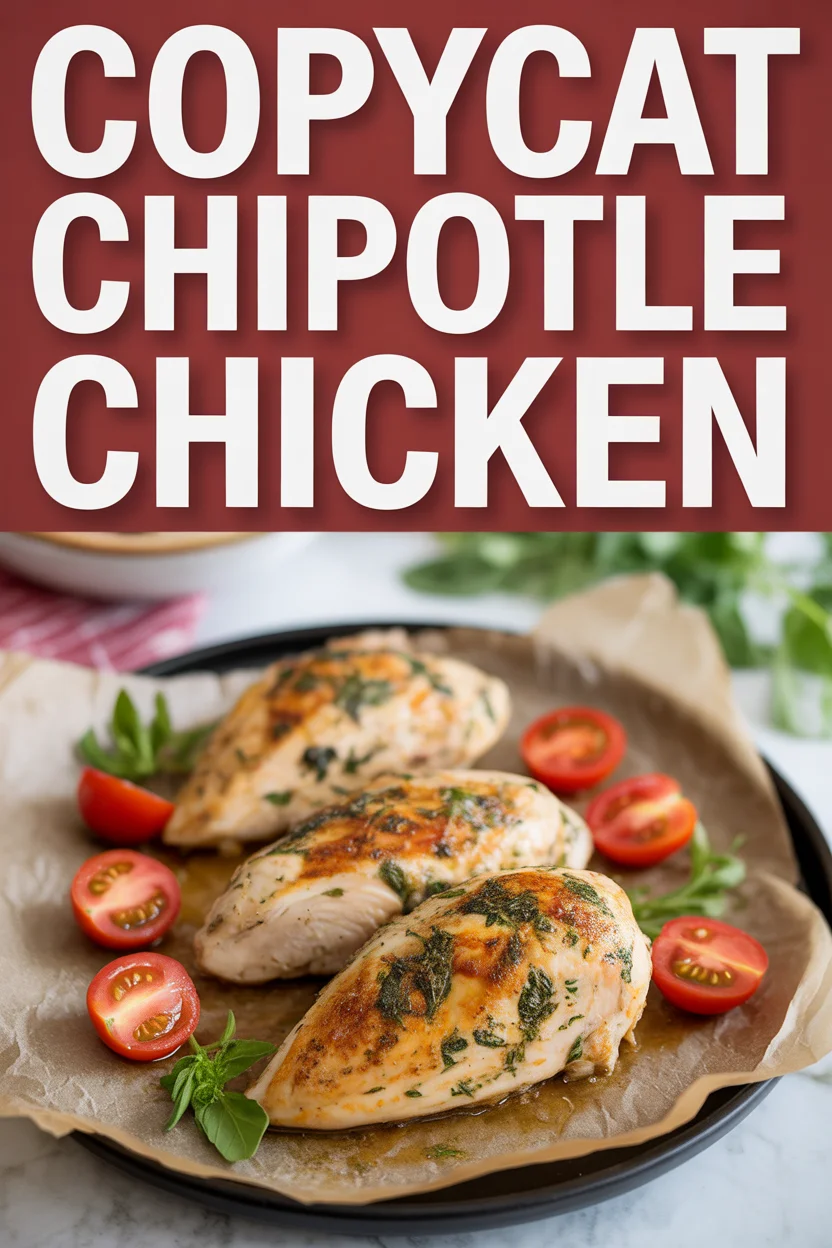
Copycat Chipotle Chicken
Copycat Chipotle Chicken is one of those meals that haunts you in the best way. You know when a craving just won’t quit? Like you’re out running errands, and suddenly you’re dying for that smoky chicken tucked inside a burrito from the big C place.
Been there. But what if you could skip the trip? Imagine getting all that savory, juicy deliciousness at home (and in your pajamas—no judgment).
Honestly, that’s why you’re here. This is for every tired weeknight when takeout feels impossible but you want something good.

What Makes Copycat Chipotle Chicken So Addictive?
I have to say, the first time I made Copycat Chipotle Chicken in my kitchen, my house smelled like a five-star restaurant (not exaggerating here). There’s this deep, smoky vibe, mixed with just enough heat, that hits differently than plain ol’ grilled chicken. It’s that combination of spices and the big punch of chipotle peppers—whole family started lurking around the kitchen asking when dinner was.
I think it’s partly about the marinade. And the fact that it’s so simple. No fancy techniques. Just a bit of time to really let those flavors soak in. Even my picky eaters turn up for this one, and they usually act like plain chicken is an insult.
The kicker? You can make a batch and use it all week long (salads, quesadillas, tacos—you name it). Handy.
Copycat Chipotle Chicken
Ingredients You’ll Need
Let’s keep it real. Here’s what you actually need to make Copycat Chipotle Chicken that tastes almost illegal.
- 1 ½ lbs boneless chicken thighs (they stay juicier than breasts)
- 2 tablespoons olive oil
- 2-3 chipotle peppers in adobo sauce, chopped up (the key, don’t skip)
- 1 tablespoon lime juice (fresh, if you have it, but trust me I’ve used bottled in a pinch)
- 2 garlic cloves, smashed
- 1 teaspoon dried oregano
- 1 teaspoon ground cumin
- 1 teaspoon smoked paprika
- 1 teaspoon salt
- ½ teaspoon black pepper
Have I eyeballed these seasonings before? Absolutely. Still tastes great.
Copycat Chipotle Chicken
Directions for the Perfect Copycat Chipotle Chicken
I’m here for easy dinners so this is as pain-free as possible. Here’s the lowdown:
- Throw the olive oil, chipotle peppers, lime juice, garlic, oregano, cumin, paprika, salt, and pepper in a big bowl. Stir it up a bit.
- Add your chicken thighs. Slop them around so every piece gets coated.
- Cover and let it hang out in the fridge. Thirty minutes works, but honestly, longer is better. Sometimes, I just leave it overnight.
- Heat a big skillet, grill pan, or even your outside grill. Medium-high is what you want.
- Cook those thighs for 5-7 minutes each side, until they look dark and a little crisp on the edges.
- Let them rest for a few (they’ll stay juicier—don’t skip this part). Chop or slice. Done.
My kitchen turns into a smell-fest and we all drool a little.
Copycat Chipotle Chicken
Serving Suggestions
Alright, here’s where you can really have some fun:
- Fold the chicken into warm tortillas with beans and rice.
- Pile it high over a salad with corn and salsa.
- Tuck it into quesadillas with all the cheese.
- Or, just eat it straight. I’ve stood at the stove with a fork (no shame).
There’s no rules here—honestly, whatever sounds good is fair game.
Copycat Chipotle Chicken
Can You Meal Prep Copycat Chipotle Chicken?
Yes, and you should if you’re a fan of lazy weekday lunches. I usually double the batch on Sundays because future-me is thankful every single time. Just let the chicken cool down, then store it in the fridge for up to four days. Tastes just as good cold. Fridge leftovers actually soak up even more flavor (honestly, it feels like cheating at life).
If you’re like me (always scrambling), you can toss the chopped chicken into a wrap or put on top of rice without even heating it.
Copycat Chipotle Chicken
“I make this every other Sunday for meal prep and it never gets old. Way better than standing in a Chipotle line after work!” – Julie, my neighbor and biggest fan of this chicken
And there you go! Try Copycat Chipotle Chicken just once and it’ll muscle its way into your weekly rotation, trust me. If you mess up, the flavor’s still great—no fancy skills required. Have fun with it, and don’t forget to give yourself a high-five when you nail that smoky taste at home.
Copycat Chipotle Chicken
A simple and delicious homemade version of the popular Chipotle chicken, full of smoky flavors and perfect for meal prep.
- Prep Time: 30 minutes
- Cook Time: 15 minutes
- Total Time: 45 minutes
- Yield: 4 servings 1x
- Category: Main Course
- Method: Grilling
- Cuisine: Mexican
- Diet: Gluten-Free
Ingredients
- 1 ½ lbs boneless chicken thighs
- 2 tablespoons olive oil
- 2–3 chipotle peppers in adobo sauce, chopped
- 1 tablespoon lime juice
- 2 garlic cloves, smashed
- 1 teaspoon dried oregano
- 1 teaspoon ground cumin
- 1 teaspoon smoked paprika
- 1 teaspoon salt
- ½ teaspoon black pepper
Instructions
- In a large bowl, combine olive oil, chipotle peppers, lime juice, garlic, oregano, cumin, paprika, salt, and pepper. Stir well.
- Add the chicken thighs and coat each piece well with the marinade.
- Cover and refrigerate for at least 30 minutes, preferably overnight.
- Heat a skillet, grill pan, or outdoor grill over medium-high heat.
- Cook the chicken thighs for 5-7 minutes on each side until dark and slightly crisp.
- Let the chicken rest for a few minutes before slicing or chopping.
Notes
Great for meal prep; the chicken can be stored in the fridge for up to four days. Can be used in tacos, salads, or quesadillas.
Nutrition
- Serving Size: 1 serving
- Calories: 350
- Sugar: 2g
- Sodium: 600mg
- Fat: 18g
- Saturated Fat: 3g
- Unsaturated Fat: 10g
- Trans Fat: 0g
- Carbohydrates: 3g
- Fiber: 0g
- Protein: 40g
- Cholesterol: 150mg

Copycat Chipotle Chicken
Ingredients
Method
- In a large bowl, combine olive oil, chipotle peppers, lime juice, garlic, oregano, cumin, paprika, salt, and pepper. Stir well.
- Add the chicken thighs and coat each piece well with the marinade.
- Cover and refrigerate for at least 30 minutes, preferably overnight.
- Heat a skillet, grill pan, or outdoor grill over medium-high heat.
- Cook the chicken thighs for 5-7 minutes on each side until dark and slightly crisp.
- Let the chicken rest for a few minutes before slicing or chopping.