Vanilla Ice Cream

Vanilla Ice Cream: 7 Delicious Ways to Make the Ultimate Homemade Treat

Vanilla Ice Cream is the absolute perfect canvas for summer memories. Welcome to the kitchen, friends—it is wonderful to have you here at HelthRecipe as we celebrate the season.

When the sun beats down on my rustic kitchen, making a batch of Vanilla Ice Cream feels like a bridge between simple ingredients and five-star vibes. I remember standing on a little wooden stool in my grandmother’s village home, watching her churn magic into a bowl.

Today, I want to show you how making Vanilla Ice Cream can be a joyful journey rather than a stressful chore. Let us turn this homemade dessert into a warm hug that you can share with your loved ones.

Key Takeaways

Before we begin, here are the essential secrets to mastering Vanilla Ice Cream in your own kitchen.

  • Mindful ingredients matter. Great Vanilla Ice Cream starts with high-quality dairy and real vanilla.
  • No fancy gear needed. A no-churn recipe can produce five-star Vanilla Ice Cream effortlessly.
  • It is the ultimate summer gift. Sharing a pint of homemade Vanilla Ice Cream spreads pure joy.

Why is vanilla ice cream the undisputed king of frozen desserts?

The Nostalgic Power of a Classic

Every single scoop of Vanilla Ice Cream holds a story waiting to be told. The familiar, floral aroma instantly transports me back to sun-drenched afternoons spent on the porch.

You simply cannot replicate the comfort that a bowl of Vanilla Ice Cream provides. It acts as a culinary anchor, reminding us of simpler times and childhood laughter.

A Blank Canvas for Summer Flavors

During the peak heat of summer, Vanilla Ice Cream becomes the ultimate foundation for vibrant, seasonal fruits. I love layering it with grilled peaches or fresh berries from the local market.

If you want to explore fruitier profiles, you might enjoy trying our Pineapple Ice Cream alongside your classic Vanilla Ice Cream. The contrast between the bright tropical notes and the creamy vanilla is extraordinary.

The Healing Magic of Simple Ingredients

Making Vanilla Ice Cream is a beautifully mindful practice that grounds you in the present moment. You only need milk, cream, sugar, and vanilla to create a masterpiece meal.

“The truest form of culinary love is taking humble ingredients and transforming Vanilla Ice Cream into a warm hug.”


This philosophy rings incredibly true when preparing a fresh batch of Vanilla Ice Cream for your family.

How can you achieve the perfect creamy texture without an expensive machine?

The Magic of the No-Churn Recipe

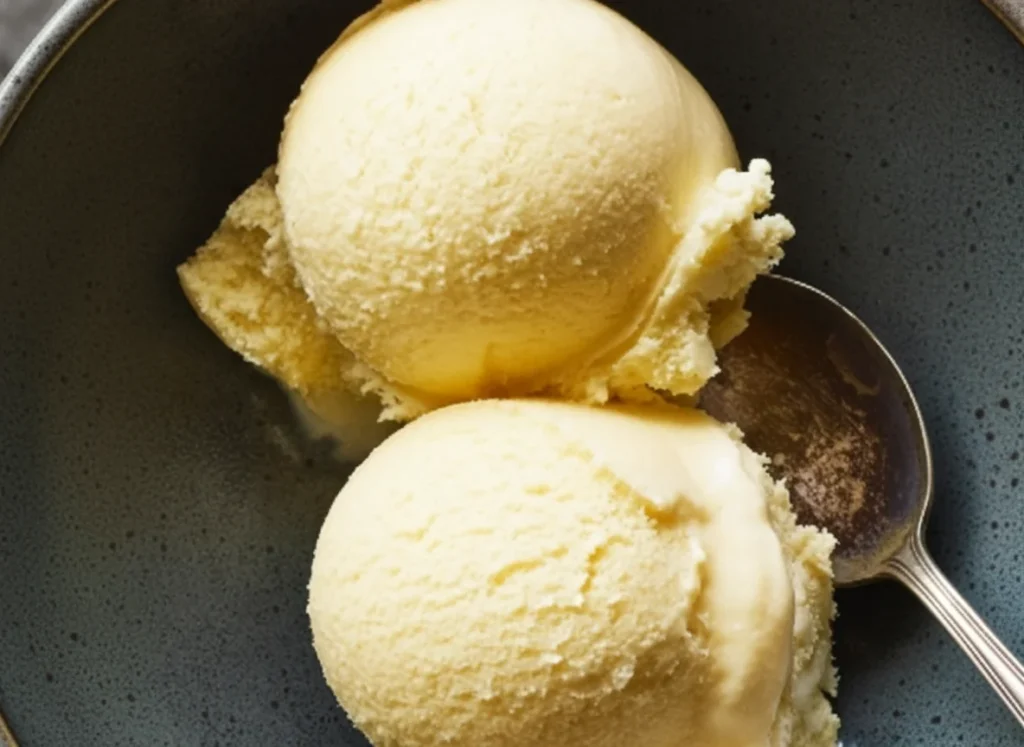
You do not need a bulky, expensive ice cream maker to craft beautiful Vanilla Ice Cream at home. A simple no-churn recipe relies on folded whipped cream to trap air and create that luscious texture.

I often use this exact method when preparing my Vanilla Ice Cream for impromptu summer dinner parties. It is completely effortless and guarantees a rich, velvety mouthfeel every time.

Whipping Cream to the Perfect Peak

The secret to airy Vanilla Ice Cream lies in how gently you treat your heavy whipping cream. You want to whip it just until stiff peaks form, capturing that vibrant energy in the bowl.

If you over-whip, your Vanilla Ice Cream will lose its delicate, cloud-like consistency. Patience is the true secret ingredient here, friends.

Freezing Techniques for Smooth Results

To prevent ice crystals from ruining your Vanilla Ice Cream, press a piece of parchment paper directly onto the surface before freezing. This little grandmotherly trick keeps the air out and the creaminess in.

For an autumnal twist using similar freezing methods, check out our No-Churn Pumpkin Ice Cream after you master your Vanilla Ice Cream base. Both recipes prove that simple techniques yield five-star results.

What is the secret ingredient that elevates ordinary vanilla to gourmet status?

Discovering Vanilla Bean Paste

If you want your Vanilla Ice Cream to taste like a rustic village dream, you must embrace vanilla bean paste. Those tiny black specks are the visual promise of an extraordinary flavor journey.

Using paste gives your Vanilla Ice Cream a profound, floral depth that standard extracts simply cannot match. It is the bridge between a basic homemade dessert and a restaurant-quality experience.

Sourcing the Best Vanilla Extracts

When paste is unavailable, high-quality pure extract will still make your Vanilla Ice Cream sing. I always recommend understanding vanilla beans to ensure you purchase the most fragrant, ethically sourced options.

A vibrant, aromatic extract transforms your Vanilla Ice Cream into a sensory masterpiece. Never settle for imitation flavors when creating this warm hug in a bowl.

Balancing Sweetness with a Pinch of Salt

My grandmother taught me that every sweet batch of Vanilla Ice Cream needs a whisper of sea salt. The salt awakens the vanilla notes and cuts through the richness of the heavy cream.

This simple addition makes your Vanilla Ice Cream taste infinitely more sophisticated. It is a tiny step that profoundly alters the final flavor profile.

Why does the choice between French and Philadelphia style change everything?

Mastering the Custard Base

French vanilla relies heavily on an egg yolk custard base to achieve its signature golden hue. This method gives the Vanilla Ice Cream a deeply rich, almost pudding-like consistency that coats the spoon beautifully.

While it takes a bit more patience, cooking the custard for your Vanilla Ice Cream is a highly rewarding, mindful task. The gentle stirring over low heat feels like a rhythmic meditation.

The Simplicity of Philadelphia Style

Conversely, Philadelphia style omits the eggs, allowing the pure dairy flavors of your Vanilla Ice Cream to shine brightly. This eggless approach tastes lighter and feels incredibly refreshing on a humid summer afternoon.

If you appreciate the clean taste of Philadelphia style, you will also adore our Peachy Buttermilk Sherbet as a companion to your Vanilla Ice Cream. Both desserts celebrate the unadulterated joy of fresh dairy.

Choosing the Right Base for Your Summer Party

When planning your menu, consider how the Vanilla Ice Cream will interact with your other desserts. A heavy chocolate cake pairs perfectly with the lighter Philadelphia-style Vanilla Ice Cream.

If you want the ice cream to stand alone as the star, the French-style Vanilla Ice Cream is your best choice. For more summer hosting tips, remember that balance is everything.

How do you pair vanilla ice cream with unexpected toppings for a mind-blowing experience?

Savory Twists on a Sweet Classic

Do not be afraid to dress up your Vanilla Ice Cream with a drizzle of high-quality olive oil and flaky sea salt. This savory twist elevates the dessert, making it taste incredibly chic and modern.

Another fantastic pairing for Vanilla Ice Cream is a splash of aged balsamic vinegar. The tart acidity cuts through the sweet cream, creating a flavor profile that tells a beautiful story.

Fresh Summer Fruit Combinations

During the warm months, I love serving my Vanilla Ice Cream alongside roasted strawberries or macerated cherries. The bubbling, juicy fruits meld perfectly with the melting cream.

You can also create a stunning dessert buffet by serving scoops of Vanilla Ice Cream next to bowls of our Pandan Ice Cream and Fresh Mint Chip Ice Cream. The vibrant colors and contrasting flavors will delight your guests.

Creating the Ultimate Dessert Gift Basket

A hand-packed pint of Vanilla Ice Cream makes an incredibly thoughtful hostess gift for summer barbecues. Pack it in a cooler with some homemade hot fudge and artisanal waffle cones.

If you want to be extra generous, include a pint of our decadent Chocolate Ice Cream alongside the Vanilla Ice Cream. Sharing these homemade treasures is the truest expression of culinary love.

Enjoying the Final Scoop

As the summer sun sets, taking that final bite of Vanilla Ice Cream feels like a gentle, sweet embrace. It is a reminder that the best things in life are crafted with love and patience.

Thank you for joining me in the kitchen today to celebrate the magic of Vanilla Ice Cream. I hope this recipe brings a touch of rustic joy to your home.
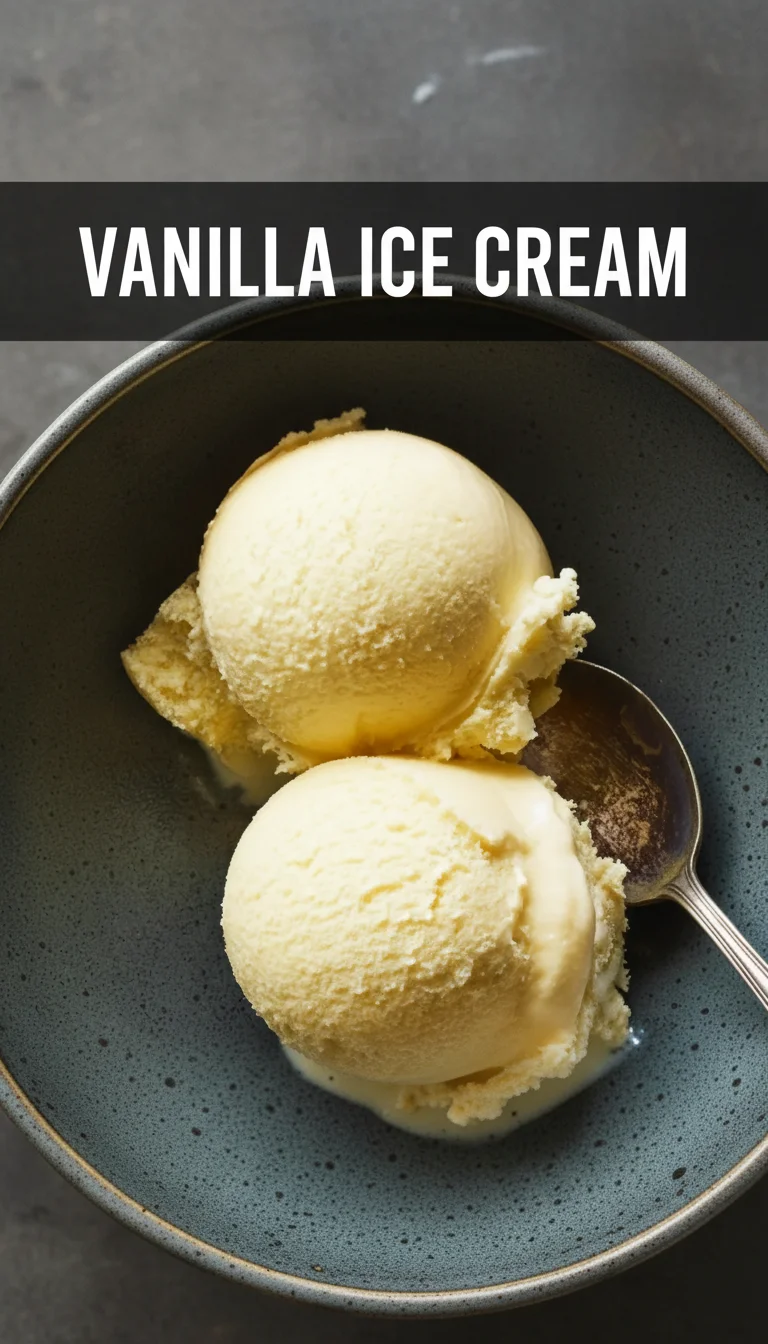
A vertical split layout containing two pictures with the main keyword 'Vanilla Ice Cream' in the center, showcasing realistic, creamy scoops of vanilla ice cream for a perfect summer treat.

Vanilla Ice Cream

A rich and creamy homemade Vanilla Ice Cream made without a churner, perfect for summer enjoyment.
Prep Time 15 minutes
Total Time 4 hours
Servings: 4 servings
Course: Dessert
Cuisine: American
Calories: 300

Ingredients
  

Main Ingredients
  • 2 cups heavy whipping cream Must be whipped to stiff peaks for the best texture.
  • 1 cup whole milk Use high-quality milk for a richer flavor.
  • 3/4 cup granulated sugar Sweeten to taste, but do not omit.
  • 1 tablespoon vanilla bean paste For the best flavor, use vanilla bean paste.
  • 1/2 teaspoon sea salt Brings out the vanilla flavor.

Method
 

Preparation
  1. In a mixing bowl, whip the heavy cream until stiff peaks form.
  2. In another bowl, whisk together milk, sugar, vanilla bean paste, and sea salt until fully combined.
  3. Gently fold the whipped cream into the milk mixture until fully incorporated.
Freezing
  1. Transfer the mixture into a freezer-safe container.
  2. Press a piece of parchment paper directly onto the surface of the ice cream mixture to prevent ice crystals.
  3. Freeze for at least 4 hours or until firm.

Notes

Serve with toppings like fresh fruit, chocolate sauce, or even a drizzle of olive oil for a unique twist. Pair it with other desserts for a delightful summer dessert buffet.

Similar Posts

  • Chia Seed Pudding and Greek Yogurt: 7 Delicious Combinations for a Power-Packed Breakfast

    Welcome to Helth Recipe! We’re excited to share some fantastic healthy breakfast ideas that will revolutionize your mornings. If you’re looking for a meal that’s both nutritious and delicious, look no further than chia seed pudding and Greek yogurt. This dynamic duo offers incredible benefits, making it a perfect start to any day. Prepare yourself…

  • Almond Flour Scones

    Almond Flour Scones are basically my “I forgot to bake and now someone’s coming over for coffee” cheat code. You know that feeling when you want to serve something homemade, but you also want it to be, well, kinda healthy? Yeah, me too. That’s when I drag out my bag of almond flour and basically magic up a batch of these beauties. They’re honestly so easy, you almost feel like you’re getting away with something. No one has to know you made them while the kettle’s heating.   Almond Flour Scones: Why I’m Obsessed Okay, let me level with you. I’ve made more scone recipes than I can count—some with enough butter to terrify my doctor—and yet, almond flour scones keep sneaking back into my kitchen lineup. For starters, almond flour just makes them crazy tender. We’re talking soft, ever-so-slightly nutty, and not dry at all. Plus, they don’t taste “grain-free” (you know that weird sandy thing some healthy recipes have? Gone). They’re super quick too. Like, measure, mix, plop onto a baking sheet, and done. Oh, and if you ask me, they turn out way fancier than the level of effort required. And let’s talk aroma—the scent while these bake will have people drifting into your kitchen, guaranteed. Seriously, almond flour scones could win awards just on fragrance. “I’m always looking for gluten-free bakes that don’t taste weird. These are PERFECT. Moist and taste just like the real deal. They freeze great too!” – Anna, actual almond flour scone lover     Key Ingredients for Almond Flour Scones Let’s keep this simple. You literally need stuff you probably already have hanging around, if you do any gluten-free or lower-carb baking. Almond flour: Make sure it’s finely ground (not almond meal). The texture matters. Baking powder: Helps the scones puff up a bit. Don’t skip! Eggs: For binding everything together. If you want extra richness, add an extra yolk (yep, I do sometimes). Butter: Cold is best. This gets you those lovely soft scone insides. Sweetener: Sugar, honey, or a sugar replacement all work here. Use what you like. Add-ins: Think dried fruit, chocolate chips, or even a sprinkle of cinnamon. These scones are not picky. I mean, if you want to get fancy, add lemon zest or a handful of berries, but honestly? Even plain, almond flour scones are pretty epic. How to Make Almond Flour Scones (Short Version: It’s Actually Easy) If you can stir, you can make these. Here’s the breakdown: First, mix your dry stuff—almond flour, baking powder, and whatever sweetener you’re using. Next, drop in the cold butter and squish it in with your fingers (messy, but also kinda fun, I won’t lie). Once it looks like crumbs, add the eggs and any extras. Stir it up until just blended. Now, don’t overthink it. Scoop your dough onto a parchment-lined tray. Shape it quickly—don’t fuss. Slice into wedges (or make little mounds if you’re lazy, I won’t tell). Bake around 20 minutes at 350°F until they’re just golden. Once they’re out, resist the urge to eat one right away. Let them cool. (Trust me, they hold together better if you wait.) Serving Suggestions So, almond flour scones are basically a blank canvas for whatever you’re in the mood for: Slather with jam or nut butter for a classic vibe. Pair with coffee, tea, or even a glass of icy almond milk. Go wild with a drizzle of honey and a pat of butter for five-star restaurant feels. If you’re feeling brave, split them open and fill with berries and whipped cream. Real talk: breakfast, snack, or dessert—these fit anywhere. Common Questions Why almond flour instead of regular flour? I like the flavor and the softer texture, plus it’s gluten-free and just a bit healthier (for my conscience at least). Do almond flour scones taste sweet? They’re lightly sweet, but not dessert-sweet. You control the sugar, so tweak for your taste buds. Can I freeze almond flour scones? Absolutely! Toss ’em in a zip bag. Toast straight from the freezer later. Lazy day win. What if mine are too crumbly? Try another egg or add a spoonful of yogurt next time. Almond flour’s different than wheat flour, so sometimes you gotta play around. Is it easy to swap add-ins? Oh, you bet. Chocolate, fruit, nuts—throw in whatever you love. Just avoid lots of wet add-ins so things don’t get soggy. Ready to Try Almond Flour Scones? Okay, so you don’t have to be a baking superstar to knock out almond flour scones, and nobody’s going to believe you whipped them up last minute. No mixer, barely any mess. If you want to master the almond flour scone life, this quick video walks you through it, or peek at the almond flour scone FAQ for more pointers. Next time you’re stumped for what to serve with afternoon tea or, you know, just feeling snacky, give these a shot. Don’t wait for a special occasion, just go for it. If you do, I promise you’ll be passing this little trick along to every friend who drops by unexpectedly. These Almond Flour Scones are delightfully soft, tender, and naturally gluten-free….

  • low carb chia pudding with greek yogurt: 7 Essential & Delicious Recipes for a Healthy Start

    Starting your day with a nutritious and satisfying meal sets the tone for optimal health. Finding healthy breakfast ideas that are both delicious and easy to prepare can be a challenge. That’s where low carb chia pudding with Greek yogurt truly shines. At Helth Recipe, we believe in simple, effective ways to boost your wellness….

  • Healthy Peanut Butter Greek Yogurt Banana Bread Muffins

    What Makes These Muffins Healthy Anyway? How to Make Healthy Peanut Butter Greek Yogurt Banana Bread Muffins Serving Suggestions Real Results: A Quick Table for Muffin Nerds Common Questions Give These Muffins a Shot (Seriously) Ever find yourself standing in the kitchen, bananas going mushy on the counter, trying to talk yourself out of just tossing them? Me too. Enter my go-to hero: Healthy Peanut Butter Greek Yogurt Banana Bread Muffins. These are what I grab when I want something a little sweet, a little wholesome, and—bonus points—they actually fill you up without that sugar crash. They’re just different enough to keep breakfast (or, let’s be real, midnight snacking) from getting boring. These muffins nail that perfect balance of soft, nutty, and satisfying. No more staring at sad bananas wishing for a miracle. Here it is.   What Makes These Muffins Healthy Anyway? People always ask if a muffin can be healthy. Yes, absolutely, these are not your run-of-the-mill, cake-in-disguise muffins. The trick is in the swap outs. Instead of using a pile of butter, I mix in creamy Greek yogurt for that soft texture. Not only does it keep these muffins moist (I mean, who likes dry muffins?), it packs in a little protein too. Peanut butter… I’m obsessed, and it brings healthy fats that do more than just taste good. I’ll be honest, keeping the sugar low here makes me feel pretty smug. The ripe bananas do most of the sweet talking. And hey, you’re getting fiber from whole wheat flour if you want to take it up a notch. This is the kind of snack that isn’t gonna wreck your day but actually makes breakfast feel like you’re doing something good for yourself.   How to Make Healthy Peanut Butter Greek Yogurt Banana Bread Muffins You won’t need anything fancy here. I usually grab two bowls—one for dry, one for wet—and that’s about it. Mash up your bananas (the browner, the better. I’m weirdly proud when mine look almost scary). Stir the Greek yogurt, peanut butter, and a splash of vanilla into the banana, then mix your flour and the usual baking essentials together in a different bowl. Pour the wet stuff into the dry and combine just until you can’t see flour. Please, trust me, do not over-mix. That’s how you get rubbery muffins and nobody wants that. Scoop into muffin cups and bake. My oven claims it’s 350°F, but check yours. My sister’s runs hot and her muffins burned once. Here’s where I get creative—sometimes I pop a few chopped walnuts on top, or even a sprinkle of dark chocolate chips if I’m feeling fancy. Do what makes you happy. They puff up, crack a little on top, and the kitchen smells like peanut butter dreams. Serving Suggestions I may be dramatic, but these Healthy Peanut Butter Greek Yogurt Banana Bread Muffins are a legit game changer. Here’s what I love: Warm from the oven with a dab of extra peanut butter—true happiness. Sliced with a drizzle of honey or a little cinnamon. Oof, so good. Freeze a batch for busy mornings or snack emergencies. Super flexible, right? I’ve even snuck ’em into a couple of kids’ lunchboxes… zero complaints so far. Real Results: A Quick Table for Muffin Nerds Here’s a non-boring table to help you size up these muffins at a glance (because some of us need to know): Ingredient Focus Why It’s Good Texture Boost Nutrition Perk Greek Yogurt Swaps out oil/butter Makes it super moist Extra protein hit Peanut Butter Healthy fats, duh Nutty depth Satiety (it fills you up!) Banana Natural sweetener Soft muffin vibe Fiber & potassium “I tried these after you posted on your Insta, and oh man—they actually tasted like dessert but kept me full through my morning workout. My kids wolfed them down. Total win.” – Jen L. Common Questions Q: Can I use any kind of Greek yogurt? A: I stick with plain, low-fat Greek yogurt, but full-fat works if you want a richer muffin. Just don’t use the super runny kind. Q: What if I only have regular flour? A: That’s no big deal. Whole wheat just adds a little more fiber, but all-purpose flour works fine. Q: Can you freeze these muffins? A: Absolutely. I wrap them up, toss ’em in the freezer, then reheat in the microwave. Perfect for lazy days. Q: Will chunky or creamy peanut butter work best? A: Totally up to you. Creamy blends smoother, but I love the little peanut bits you get from the chunky kind. Q: How ripe do my bananas need to be? A: Go as ripe as possible. If they look a little scary, you’re on the right track. The flavor will be way deeper. Healthy Peanut Butter Greek Yogurt Banana…